


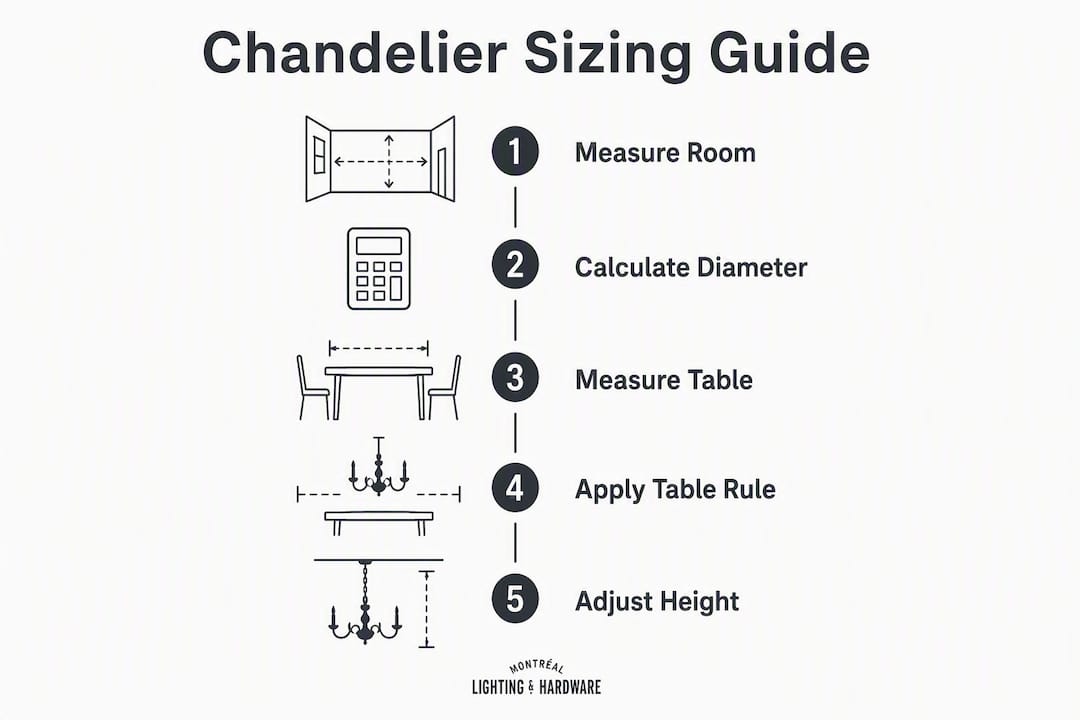
Two formulas cover most chandelier sizing decisions. For open rooms, add the room’s length and width in feet and read that sum as inches: a 12 ft × 14 ft room starts at a 26-inch diameter. For fixtures hanging over a table, aim for a diameter equal to roughly 1/2 to 2/3 of the table’s width. For a linear chandelier, target 1/2 to 2/3 of the table’s length. Both formulas give you a starting point, not a final answer, but they get you close enough to shop with confidence.
Quick reference numbers to keep handy:
- Room formula: length (ft) + width (ft) = starting diameter (in)
- Table rule: fixture diameter ≈ 1/2 to 2/3 of table width; linear fixture ≈ 1/2 to 2/3 of table length
- Over a table: hang the lowest point 30–36 inches above the tabletop at a standard 8 ft ceiling
- Walk-under clearance: keep the lowest point at least 7 ft (84 in) above the finished floor in any open area
- Two fixtures: consider a pair when a single linear fixture would exceed roughly 60 inches
- Ceiling height adjustment: add ~3 inches to the table gap for each foot of ceiling above 8 ft
Table of Contents
- How do you size a chandelier for your room?
- What size chandelier works over a dining table?
- How high should you hang a chandelier?
- Worked examples and a quick-reference chart
- Common sizing mistakes designers see every time
- What should you measure before buying or calling an electrician?
- Key Takeaways
- Why the furniture-first rule reduces sizing errors
- Find the right fixture with Montreal Lighting & Hardware
- Useful sources and tools
How do you size a chandelier for your room?
The room-diameter formula works because it scales naturally with the space a fixture needs to fill. Measure your room’s length and width in feet, add them together, and that number in inches is your minimum starting diameter. A 10 ft × 12 ft bedroom points you toward a 22-inch fixture; a 12 ft × 14 ft dining room suggests roughly 26 inches as the floor.
That number is a floor, not a ceiling. Visual scale, furniture arrangement, and traffic flow all pull the result up or down. A room with a large sectional sofa and a heavy dining table can absorb a slightly larger fixture. A spare, minimalist space often looks better with a fixture at the lower end of the range.
Here is how to apply the formula step by step:
- Measure the room’s length and width in feet (use a tape measure from wall to wall, not furniture to furniture).
- Add the two numbers together.
- Read the sum as inches — that is your starting diameter.
- Check whether the room skews large in one dimension (long and narrow vs. square). A long, narrow room may benefit from a slightly smaller diameter or a linear fixture instead.
- Adjust for furniture density: a room full of large, dark pieces can handle a larger fixture; an airy, lightly furnished room usually looks better at the lower end.
- For open-concept spaces, treat the seating or dining zone as its own footprint rather than sizing to the entire open area. A 10 ft × 12 ft dining zone within a 20 ft × 24 ft open plan should use the 10 × 12 measurement.
Retailers often group fixtures into four practical size bands: small (under 20 in), medium (21–26 in), large (27–34 in), and oversized (35 in and above). Running the room formula first tells you which band to browse.
What size chandelier works over a dining table?
The table relationship takes priority over the room formula the moment a fixture hangs directly above a piece of furniture. A chandelier over a dining table belongs to that table first, the room second.

For round, oval, or square fixtures, aim for a diameter equal to 1/2 to 2/3 of the table’s width. For rectangular or linear chandeliers, target 1/2 to 2/3 of the table’s length. Both rules come from the same logic: the light pool should feel centered and generous without visually spilling past the table’s edges.
Practical examples by table size:
- 42-inch round table: fixture diameter 21–28 in
- 60-inch rectangular table: round/oval fixture 30–40 in; linear fixture 30–40 in
- 72-inch rectangular table: round/oval fixture 36–48 in; linear fixture 36–48 in
- Edge clearance: leave at least 6 inches between the fixture’s outer edge and the table’s edge so light falls evenly and the fixture doesn’t feel crowded
When a single linear fixture would need to exceed roughly 60 inches to satisfy the 2/3 rule, two smaller fixtures centered over each half of the table usually give better light distribution and easier installation.
Pro Tip: On a very long table (84 in or more), two 36-inch linear fixtures spaced evenly almost always look more balanced than one oversized piece, and they give you more flexibility with dimming and bulb placement.
How high should you hang a chandelier?

Hanging height affects both safety and the way a fixture reads in a room. Get it wrong in either direction and the fixture either disappears visually or becomes a hazard.
Key numbers to work from:
- Over a dining table: 30–36 inches from the tabletop to the fixture’s lowest point at a standard 8 ft ceiling
- Ceiling height adjustment: add approximately 3 inches to that gap for each foot of ceiling height above 8 ft, so a 10 ft ceiling suggests 36–42 inches above the tabletop
- Open-room clearance: the lowest point of any fixture in a walkable area should clear at least 7 ft (84 in) above the finished floor
- Foyers and stairwells: for tall foyers, center the fixture visually from the most-used vantage point (often the second-floor landing) rather than from the floor plan alone; see the staircase chandelier guide for clearance specifics
Beyond the drop, the fixture’s body height should feel proportional to the ceiling. A practical rule is to allow some proportional height relative to the total ceiling height, generally increasing with taller ceilings.
| Ceiling height | Suggested drop over table | Minimum walk-under clearance | Suggested fixture body height |
|---|---|---|---|
| 8 ft | 30–36 in | 84 in | 20–24 in |
| 9 ft | 36–42 in | 84 in | 22–27 in |
| 10 ft | 36–42 in | 84 in | 30 in |
| 12 ft | 42–48 in | 84 in | 30–36 in |
Worked examples and a quick-reference chart
Seeing the math in action makes the formulas easier to trust. Here are four common scenarios:
10 ft × 12 ft bedroom: 10 + 12 = 22 → start at a 22-inch diameter. At an 8 ft ceiling with a standard drop, hang the fixture so the lowest point clears 84 inches. A small to medium fixture in the 20–24 inch range fits comfortably.
12 ft × 14 ft dining room: 12 + 14 = 26 → 26-inch minimum diameter for the room. But if the table is 42 inches wide, the table rule points to 21–28 inches. The two ranges overlap, so a 26–28 inch fixture satisfies both.
14 ft × 16 ft living room: 14 + 16 = 30 → a 30-inch starting diameter. With a 9 ft ceiling, add 3 inches to the standard table drop if a fixture hangs over a coffee table grouping, and keep the lowest point above 84 inches for circulation.
72-inch dining table, 10 ft ceiling: Table rule → linear fixture 36–48 inches long. Ceiling adjustment → hang 36–42 inches above the tabletop. A large chandelier in the 36–42 inch body range fits the proportion rule for a 10 ft ceiling.
| Room size | Room formula result | Suggested diameter range | Retail size band |
|---|---|---|---|
| 10 × 10 ft | 20 in | 20–22 in | Small–Medium |
| 10 × 12 ft | 22 in | 20–24 in | Small–Medium |
| 12 × 14 ft | 26 in | 24–28 in | Medium |
| 14 × 16 ft | 30 in | 28–34 in | Large |
| 16 × 20 ft | 36 in | 34–40 in | Oversized |
| Table width | Round/oval fixture range | Linear fixture range |
|---|---|---|
| 36 in | 20–24 in | 20–24 in |
| 42 in | 21–28 in | 21–28 in |
| 60 in | 30–40 in | 30–40 in |
| 72 in | 36–48 in | 36–48 in |
When the room formula and the table rule disagree, trust the table rule for any fixture hanging directly over furniture. The table relationship comes first.
Common sizing mistakes designers see every time
Most chandelier sizing errors fall into a small number of patterns. Knowing them in advance saves a return trip to the store.
- Sizing too small: the single most common mistake. A fixture that looks large in a showroom can disappear in a real room. When in doubt, go to the upper end of your calculated range.
- Using the whole open-plan footprint: in an open-concept space, applying the room formula to the entire floor area produces a fixture that overwhelms the dining zone. Size to the zone, not the whole room.
- Hanging too low: a fixture at eye level creates glare and blocks sightlines across the table. The 30–36 inch table gap is a minimum comfort zone, not an aesthetic preference.
- Ignoring visual weight: an open, airy frame can be sized slightly larger than the formula suggests without feeling heavy. A dense, dark, or crystal-laden fixture should sit at the lower end of the range or even slightly below it to avoid a heavy visual mass.
- Skipping the furniture relationship: a fixture that belongs to the room but not to the table beneath it will always feel slightly off, even when the math is right.
Pro Tip: Tape a piece of cardboard or kraft paper to the ceiling in the fixture’s planned diameter before you order. Living with that circle for a day or two tells you more than any formula.
Fixture weight matters too. Heavy chandeliers, particularly those over 50 lbs, typically require a rated structural support box rather than a standard ceiling box. That is a job for a licensed electrician, not a weekend project.
What should you measure before buying or calling an electrician?
Gathering the right numbers before you shop saves time and prevents costly surprises. Work through this checklist before contacting a retailer or booking an installer.
- Room length and width (wall to wall in feet, not furniture to furniture)
- Ceiling height (floor to finished ceiling, not to any existing fixture)
- Table width and length (for over-table fixtures)
- Table height (standard dining tables are 30 inches; confirm yours)
- Existing mounting box location (centered over the table? Centered in the room?)
- Current chain or rod length (if replacing an existing fixture)
- Fixture weight rating of the existing box (stamped inside the box; most standard boxes are rated for 35–50 lbs)
- Dimmer compatibility (LED fixtures often require specific dimmer models; confirm before purchasing)
- Desired clearance from table edge (aim for at least 6 inches on each side)
When you call a retailer or electrician, ask: What body height do they recommend for your ceiling? Does the fixture require a separate support brace? Is the chain or rod adjustable, and to what maximum length? In Canada, electrical installation must be performed by a licensed electrician under provincial electrical codes. Confirming that detail upfront avoids permit issues later.
Key Takeaways
The furniture-first rule is the single most reliable guide to chandelier sizing: when a fixture hangs over a table, the table’s dimensions matter more than the room’s.
| Point | Details |
|---|---|
| Room formula | Add room length + width in feet; read the sum as the starting diameter in inches. |
| Table rule | Fixture diameter = 1/2 to 2/3 of table width; linear fixture = 1/2 to 2/3 of table length. |
| Hanging height | Hang 30–36 in above the tabletop at 8 ft ceilings; add ~3 in per extra ceiling foot. |
| Walk-under clearance | Keep the fixture’s lowest point at least 84 in (7 ft) above the finished floor. |
| Montreal Lighting & Hardware | Offers sizing guidance, product pages with listed weights and dimensions, and a trade program for designers across Canada. |
Why the furniture-first rule reduces sizing errors
The room formula is a reliable starting point, but it answers the wrong question when a fixture belongs to a specific piece of furniture. A chandelier over a dining table is not decorating the room; it is lighting the table. Sizing it to the room footprint instead of the table almost always produces a fixture that feels disconnected, either too large and imposing or too small to anchor the space below it.
At Montreal Lighting & Hardware, the most common reason customers request exchanges is that a fixture looked right in the room calculation but felt wrong over the table. The fix is almost always the same: go back to the table’s width, apply the 1/2 to 2/3 rule, and let that number lead. The room formula then becomes a sanity check rather than the primary guide.
For designers working on multiple projects, this distinction also reduces client callbacks. A fixture sized to the furniture relationship reads as intentional. One sized purely to the room can feel like a coincidence.
Find the right fixture with Montreal Lighting & Hardware
You have the formulas, the worked examples, and the checklist. The next step is finding a fixture that fits those numbers and feels right in your space.

Montreal Lighting & Hardware carries a curated range of chandeliers and pendants, from compact mini chandeliers suited to bedrooms and small dining rooms to grand multi-light statement pieces for tall foyers. Every product page lists the fixture’s diameter, body height, and weight, so you can cross-reference your measurements before adding to cart. If you are a designer or contractor, the trade program offers exclusive pricing and dedicated support across Canada.
Bring your measurements (room dimensions, table size, ceiling height, and desired drop) and the team at Montreal Lighting & Hardware will help you match a fixture to your space. Fast shipping across Canada means your fixture arrives ready to install once your electrician is booked.
Useful sources and tools
- Chandelier Size Calculator — Lumen Calculator: an online tool that applies the room-sum and table-first formulas, adds a look factor for visual density, and flags edge cases where two fixtures may work better than one
- 6 Interior Door Replacement Mistakes and How to Avoid Them — One Day Doors & Closets: a practical look at fit-and-scale mistakes in home hardware projects that parallels the sizing errors covered here
