


The best approach for most garages is a layered LED plan: rows of linkable LED shop lights or T8 battens for even ambient coverage, a dedicated task light or under-cabinet strip at the workbench, and a motion sensor or smart plug to handle the rest automatically. Start with these three moves and you’ll solve 90% of what makes garages feel dim and frustrating.
Here’s what that plan looks like at a glance, according to practical layout guidance:
- Ambient layer: Two or three rows of linkable 4-ft LED shop lights running the length of the ceiling
- Task layer: Under-cabinet LED strips or an adjustable arm light positioned 18–24 inches above your workbench surface
- Controls: A motion sensor or smart plug so lights come on the moment you open the door
- Lumen targets: 50 lm/ft² for parking and storage; 75–100 lm/ft² for workshop tasks
- Color temperature: 5000K daylight white, CRI 80+ for general work and CRI 90+ for detail tasks like paint matching or auto detailing
Pro Tip: If you rent or want a zero-drill solution, a deformable screw-in LED panel (the kind with foldable arms) that drops into your existing ceiling socket and can triple your light output in under five minutes.
Montreal Lighting & Hardware carries fixture categories for every step of this plan, from practical LED battens to designer flush mounts for finished spaces.
Table of Contents
- What fixture types work best for garages?
- How do you layer ambient, task, and accent lighting?
- Canadian conditions: IP ratings and cold-weather performance
- Plug-in vs. hardwired: how to decide and add smart controls
- Maintenance, common mistakes, and a safety checklist
- Key Takeaways
- What the right garage lighting actually comes down to
- Ready to light your garage the right way?
- Useful sources and further reading
What fixture types work best for garages?
Fixture choice shapes the whole experience, from installation effort to the quality of light at your workbench. Here’s a clear breakdown:
Linkable LED shop lights (T5/T8 battens): The practical default for most homeowners. They daisy-chain from a single outlet, output 3,500–5,000 lumens each, and install in minutes with hooks or surface mounts. Ideal for unfinished ceilings with exposed joists.
Flush-mount LED ceiling lights: Clean, low-profile, and well-suited to finished garages or spaces that double as a gym or hobby room. They require hardwiring but look polished. Sonneman’s Pi LED Surface Mount is a refined option for finished garage zones.
LED wraparound fixtures: A step up from bare battens, with a frosted diffuser that softens the light. Good for garages with drywall ceilings where aesthetics matter a little more.
High-bay and low-bay LED fixtures: High bays suit ceilings above 12 ft; low bays work well at 8–12 ft. Both deliver concentrated, high-output light and are common in larger workshop or commercial setups.
Recessed LED downlights: Best for fully finished garages. They require ceiling access for wiring and don’t suit open-joist ceilings, but they deliver a clean, architectural look.
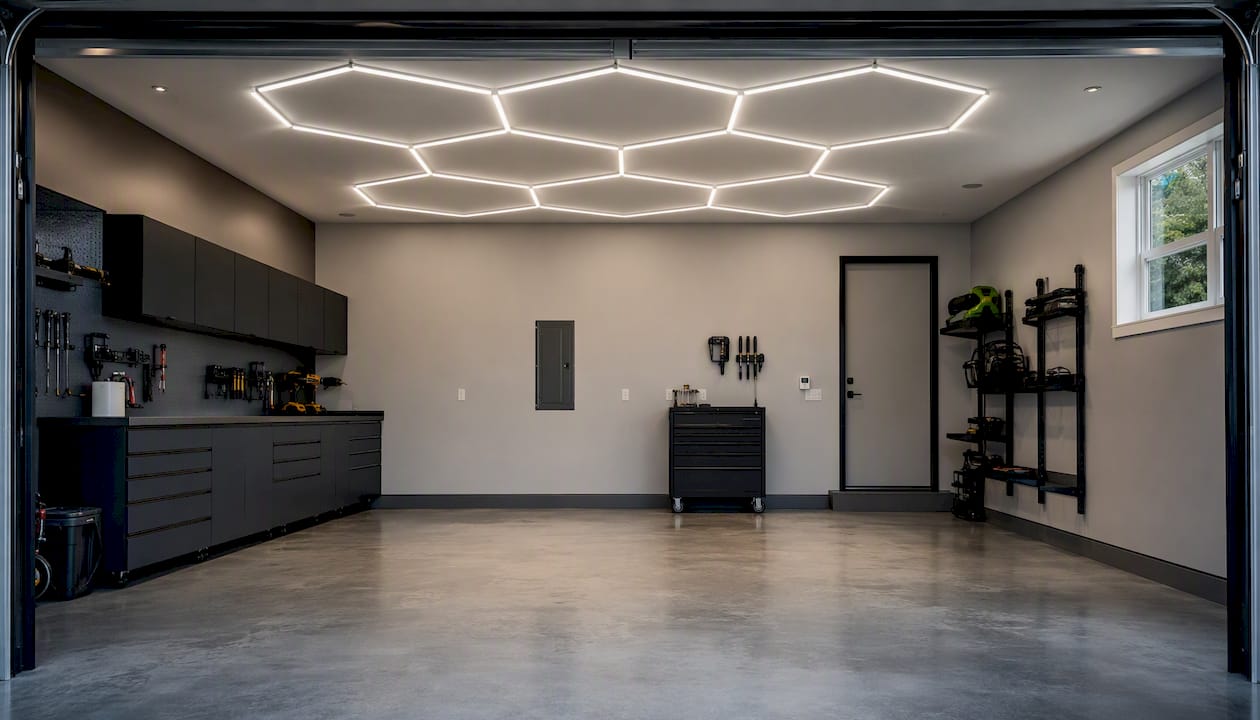
Modular hex/honeycomb LED panels: A premium option for full-ceiling coverage. These systems are sold in grid kits — a 14-grid system can deliver roughly 37,000–41,000 lumens for a two-car garage with no dark zones, according to hex grid sizing guidance. The visual impact is striking, though the cost reflects it.
Under-cabinet and task strips: LED strip lights or puck lights mounted under shelving or wall cabinets bring focused light exactly where you need it without adding ceiling clutter.
Portable and clamp-on work lights: Magnetic base lights, tripod floods, and under-hood LED bars are invaluable for automotive work. They go where fixed fixtures can’t.
- Plug-in linkable shop lights: best for renters and DIYers, zero electrical work required
- Hardwired flat panels: cleaner finish, switch and dimmer compatible, may need an electrician
- High-bay fixtures: only worth it above 12-ft ceilings; overkill for standard residential garages
- Hex grids: premium aesthetics and coverage, sized by kit for your square footage
Linkable LED shop lights are the single most effective upgrade for most residential garages — they’re bright, affordable, and require no electrical work beyond a standard outlet. For finished or multi-purpose spaces, pairing them with a designer flush mount or pendant from a brand like Sonneman adds warmth and visual texture without sacrificing function.
Pro Tip: For a garage that doubles as a gym or hobby space, consider one row of practical shop lights for task areas and a single decorative flush mount or pendant near the entry zone. The contrast between functional and ambient light makes the space feel intentional rather than industrial.
How do you layer ambient, task, and accent lighting?
A three-layer approach consistently produces the best results in garages: ambient light handles overall coverage, task light handles precision work, and accent or safety light handles transitions and edges.
Ambient: Your rows of shop lights or battens. These run the length of the ceiling and provide the baseline brightness that eliminates the “cave” effect — that flat, shadowy dimness that makes even a well-stocked garage feel uninviting.
Task: Dedicated fixtures at benches, saws, and machines. Mount a strip light or adjustable arm light 18–24 inches above your workbench surface. Avoid placing a fixture directly overhead and behind you — that’s how you cast your own shadow onto the work. Position task lights slightly in front of and above the work surface instead.
Accent and safety: Under-shelf LED strips, step lights near the entry door, and floor-level lighting near stairs or storage zones. These aren’t about brightness — they’re about reducing contrast between the bright center of the garage and darker edges, which is where trips and bumps happen.
- Workbench: strip light or arm lamp, 18–24 inches above surface, positioned slightly forward
- Table saw or drill press: side-mounted task light, never directly overhead
- Storage wall: under-shelf strips to illuminate bins and labels
- Entry and steps: low-level accent or motion-activated night light
Pro Tip: If you work at a bench with overhead lighting only, stand in your normal working position and look at where your shadow falls. That shadow is exactly where your task light needs to go.
Canadian conditions: IP ratings and cold-weather performance
Canadian garages face conditions that most lighting guides don’t account for: freezing winters, road salt tracked in on tires, and the condensation that forms when a cold car meets a warmer interior. These factors make fixture selection more consequential here than in a climate-controlled space.
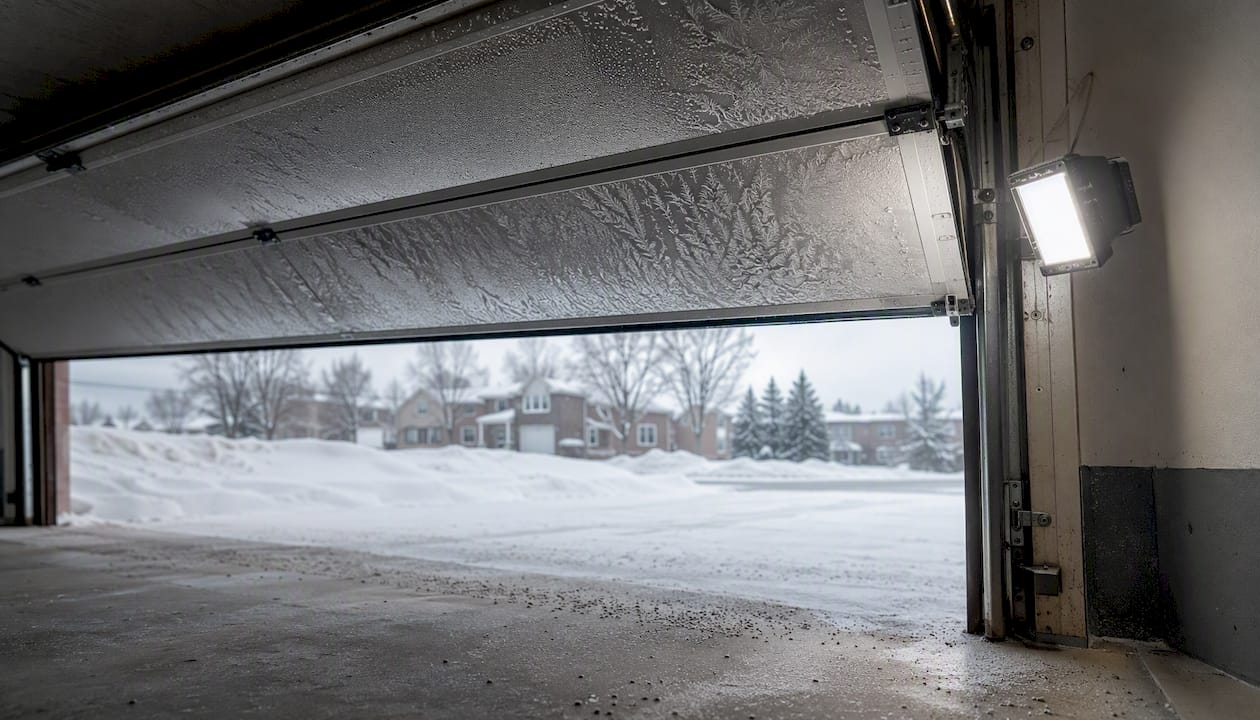
IP ratings define how well a fixture resists dust and moisture. For a dry, finished, heated garage, IP20 is adequate. For an unheated or unconditioned garage — or any space where condensation, humidity, or splashing water is possible — choose IP65 or higher. CSA Group guidance aligns with this: match the IP rating to the actual environmental conditions, not the ideal ones.
Cold-weather performance is where LEDs genuinely outperform fluorescents. Fluorescent tubes struggle to start below freezing and lose significant output in cold conditions. LEDs turn on instantly at any temperature and maintain their rated output even in unheated garages, making them the clear choice for Canadian winters.
Pro Tip: For fixtures near the garage door opening — where cold air, moisture, and road salt are most concentrated — choose an IP65-rated fixture and seal any ceiling penetrations with foam backer rod before the fixture goes up. It takes ten minutes and prevents years of corrosion.
A note on electrical safety: any hardwiring, new circuit installation, or ballast bypass must comply with the Canadian Electrical Code. When in doubt, consult a licensed electrician. The CSA Group is the authoritative body for Canadian electrical standards.
Plug-in vs. hardwired: how to decide and add smart controls
The install decision comes down to two questions: do you own the space, and does your ceiling have exposed joists or finished drywall?
- Renting or want zero electrical work? Plug-in linkable shop lights are your answer. Daisy-chain up to six fixtures from a single outlet, hang them on hooks, and you’re done.
- Own the home, exposed joists? Hardwired battens or shop lights give a cleaner look and let you add a wall switch or dimmer. A licensed electrician is needed only if you’re adding a new circuit or moving the panel connection.
- Finished ceiling, want a polished result? Hardwired flush mounts or recessed lights are the right call. Budget for an electrician unless you’re comfortable with wiring.
- Want smart controls? A smart plug on a daisy-chained shop light string lets you control the whole row from your phone or a voice assistant. For hardwired setups, a smart switch compatible with common home automation protocols (Z-Wave, Zigbee, or Wi-Fi) works well.
Motion sensors are particularly useful in garages. A motion-activated fixture near the entry door means lights come on the moment you walk in — no fumbling for a switch with your arms full.
- Plug-in linkable strips: DIY-friendly, no permits, limited to outlet proximity
- Hardwired fixtures: switch/dimmer compatible, cleaner finish, may require a permit for new circuits
- Smart plugs: easiest automation upgrade for plug-in setups
- Motion sensors: best for entry zones and single-use areas
Pro Tip: Before adding any hardwired fixture, check your existing lighting circuit’s load. Most residential lighting circuits are 15A. A string of ten 40W-equivalent LED fixtures draws well under 5A total, so load is rarely the issue — but sharing that circuit with a garage door opener and a refrigerator can get tight.
Maintenance, common mistakes, and a safety checklist
Good fixture placement and regular upkeep prevent most garage lighting failures. Here’s what to stay on top of:
Annual maintenance:
- Wipe lens covers and diffusers with a damp cloth — dust buildup can reduce light output noticeably over time
- Check plastic housings for yellowing or warping, which signals heat stress from a driver running too hot
- Test motion sensors and smart plugs to confirm they’re responding correctly
- Inspect mounting hardware for any loosening, especially near the garage door where vibration is constant
Common mistakes to avoid:
- Single center fixture: this creates the “cave” effect, with bright center and dark edges — always distribute multiple fixtures
- Lights above the door track: when the door opens, it blocks them entirely
- Overloading a shared circuit with high-draw appliances alongside lighting
- Ignoring IP ratings for damp or unconditioned spaces
Safety checklist:
- All mounts are secure and rated for the fixture weight
- Fixtures are properly grounded per Canadian Electrical Code
- No flammable materials stored within 12 inches of any fixture
- Any ballast bypass or hardwiring change done by a licensed electrician
- IP65 or higher used in any area exposed to moisture or condensation
Pro Tip: If your LED fixtures flicker, the cause is almost always the driver, not the wiring. A flickering LED that’s on a dimmer circuit is usually incompatible with that dimmer’s minimum load. Try the fixture on a non-dimmed circuit first to confirm before replacing wiring.
Key Takeaways
The most effective garage lighting plan combines rows of linkable LED shop lights for even ambient coverage, dedicated task lighting at the workbench, and motion or smart controls — sized to 50 lm/ft² for parking/storage, 75–100 lm/ft² for workshop tasks, and 100–150 lm/ft² for precision work.
| Point | Details |
|---|---|
| Lumen targets by use | 50 lm/ft² for parking/storage; 75–100 lm/ft² for workshop tasks; 100–150 lm/ft² for precision tasks. |
| Layout rule | Space fixture rows no further apart than ceiling height; keep fixtures out of the garage door track zone. |
| Color and CRI | 5000K daylight white with CRI 80+ for general work; CRI 90+ for detailing or paint matching. |
| Canadian durability | Choose IP65+ fixtures for unheated or damp garages; LEDs outperform fluorescents in freezing temperatures. |
| Montreal Lighting & Hardware | Stocks Sonneman flush mounts and LED battens for Canadian buyers, with a trade program for design professionals. |
What the right garage lighting actually comes down to
Most garage lighting guides focus on lumens and fixtures, and those details matter. But the bigger mistake most homeowners make is treating the garage as a single-use space and lighting it accordingly — one bright center fixture, no task light, no thought given to where shadows fall.
The garages that actually work well are the ones lit with intention. That means thinking about what you do in each zone before you buy a single fixture. A parking-only garage and a woodworking shop have genuinely different needs, and a gym conversion has different needs still. The layered approach — ambient rows, dedicated task light, accent or safety light at the edges — isn’t a luxury. It’s just how functional spaces are lit.
One thing worth saying plainly: the fixture quality matters more than most buyers expect. A cheap driver that flickers under load, a housing that yellows after one Canadian winter, or a fixture with a CRI of 65 that makes every color look washed out — these aren’t minor inconveniences. They affect how long you want to spend in the space. Spending a little more on a fixture with a rated 50,000-hour lifespan and a flicker-free driver pays back quickly in a space you actually use.
Ready to light your garage the right way?
Montreal Lighting & Hardware is Canada’s resource for both practical and designer lighting, with fixture options that cover every garage scenario in this guide. For finished or multi-purpose garage spaces, the Sonneman Light Guide Ring LED pendant and the Pi LED Surface Mount deliver clean, high-output LED light with a refined finish that holds up in converted gym or hobby spaces. For practical workshop installs, the catalog includes LED battens and flush-mount panels suited to exposed-joist and finished ceilings alike.

Trade professionals and contractors have access to a dedicated trade program with exclusive pricing. Browse the full fixture catalog, check current stock, and get in touch with the team at montreallighting.com to find the right fit for your project.
Useful sources and further reading
These sources informed the guidance in this article and are worth bookmarking for deeper technical detail:
- Ultimate Garage Lighting Guide 2026: Lumens, Layouts & Best LED Shop Lights
- Complete Garage Lighting Guide 2026
- CSA Group
- Workshop lighting guide — The Tool Scout
- Best garage lighting — BobVila
- Garage lighting ideas — This Old House
- Illuminating Engineering Society (IES)
- LED lighting for garage ceiling: Upgrade guide
Recommended
- Best Bathroom Vanity Lights for Canadian Homeowners – Montreal Lighting & Hardware
- Staircase Chandelier Ideas: Style, Size & Safety Guide – Montreal Lighting & Hardware
- Best Lighting Stores in Montreal for Homeowners and Designers – Montreal Lighting & Hardware
- Sloped Ceiling Lighting: Best Fixtures for Vaulted Spaces – Montreal Lighting & Hardware
