


The fastest way to make merchandise sell better is layered lighting: combine moderate ambient light with bright, well-aimed accents, high-CRI LEDs, and simple zoning or dimming controls. That combination, guided by IES glare and contrast principles, is what turns a flat, evenly lit room into a store that actually sells. The store-by-store recipes below give you the specific fixtures, color temperatures, and light levels to make it happen.
TL;DR:
- Most stores should prioritize a three-to-five times brightness contrast between accent and ambient lighting to effectively draw customer attention.
- Layered lighting with adjustable track heads, recessed downlights, and narrow-beam accents offers flexibility for different store types and merchandise zones.
- High-CRI 90+ LEDs and consistent color temperature across zones are essential for accurate color rendering and a cohesive customer experience.
- Targeted fixes such as relighting fitting rooms and enhancing hero displays often yield more sales impact than simply increasing overall brightness.
- A quick-serve light meter test and minor adjustments can identify poorly performing fixtures, with professional help needed only for driver compatibility or advanced controls.
Table of Contents
- Retail Lighting Ideas That Start With Layering
- Fixture Types and Where Each One Belongs
- Color Temperature and CRI Rules by Store Type
- Setting Light Levels by Zone
- High-ROI Fixes: Fitting Rooms, Hero Displays, and Windows
- Controls, LEDs, and Real Operating Costs
- Common Retail Lighting Mistakes and Quick Fixes
- A One-Day Lighting Test You Can Run This Week
- Montreal Lighting & Hardware’s Take on Getting This Right
- Source Fixtures and Get Trade Pricing at Montreal Lighting & Hardware
- Sources
- FAQ
Retail Lighting Ideas That Start With Layering
Every well-lit store, whether it is a jewel-box boutique or a big-box grocery aisle, is built on four layers working together rather than one blanket of brightness. Skip a layer and the room feels either flat and forgettable or harsh and chaotic. Get the mix right and the merchandise does the talking.
Ambient light fills the room with a comfortable, even base so customers can move through the store safely and read signage without squinting. Task light handles work zones, cash wraps, wrap stations, tailoring corners, where employees and customers need to see fine detail clearly. Accent light is the workhorse of retail sales: narrow, punchy beams that pull the eye toward a mannequin, an endcap, or a hero product. Display light, often built into cases, shelves, or niches, adds a final layer of sparkle to jewelry cases, cosmetics counters, and specialty items.
The relationship between ambient and accent brightness, the accent ratio, is where most stores either win or lose. A widely used consultancy benchmark calls for accent light running roughly three to five times brighter than the surrounding ambient level on hero displays. That contrast is what makes a customer’s eye go straight to the featured jacket instead of wandering.
How this plays out depends heavily on store type:
- Boutiques and specialty shops lean hard on accent contrast: dim the ambient slightly, then let track heads punch up individual pieces so every rack feels curated rather than crowded.
- Apparel chains need consistent ambient coverage across large floor plates, with accent lighting reserved for seasonal endcaps and new arrivals so the eye still has somewhere to land.
- Grocery stores rely on even, bright ambient light for wayfinding and food safety perception, with focused accents reserved for bakery cases, wine displays, and seasonal tables.
- Electronics and specialty retailers often skip heavy accenting altogether in favor of clean, neutral, glare-free ambient light that renders screens and metal finishes accurately.
Once you know which layers your floor plan needs, the next decision is which fixtures actually deliver them.
Fixture Types and Where Each One Belongs
Track lighting remains the backbone of flexible retail spec work because it lets you re-aim accents the moment a merchandising plan changes, without an electrician on speed dial. Recessed downlights handle the ambient layer efficiently in fixed ceiling grids, while linear fixtures excel at washing long runs of shelving or gondola aisles with even light. Pendants add a decorative, branding layer over cash wraps and feature tables, and LED strip lighting tucks into shelves, niches, and case interiors where a visible fixture would look out of place.
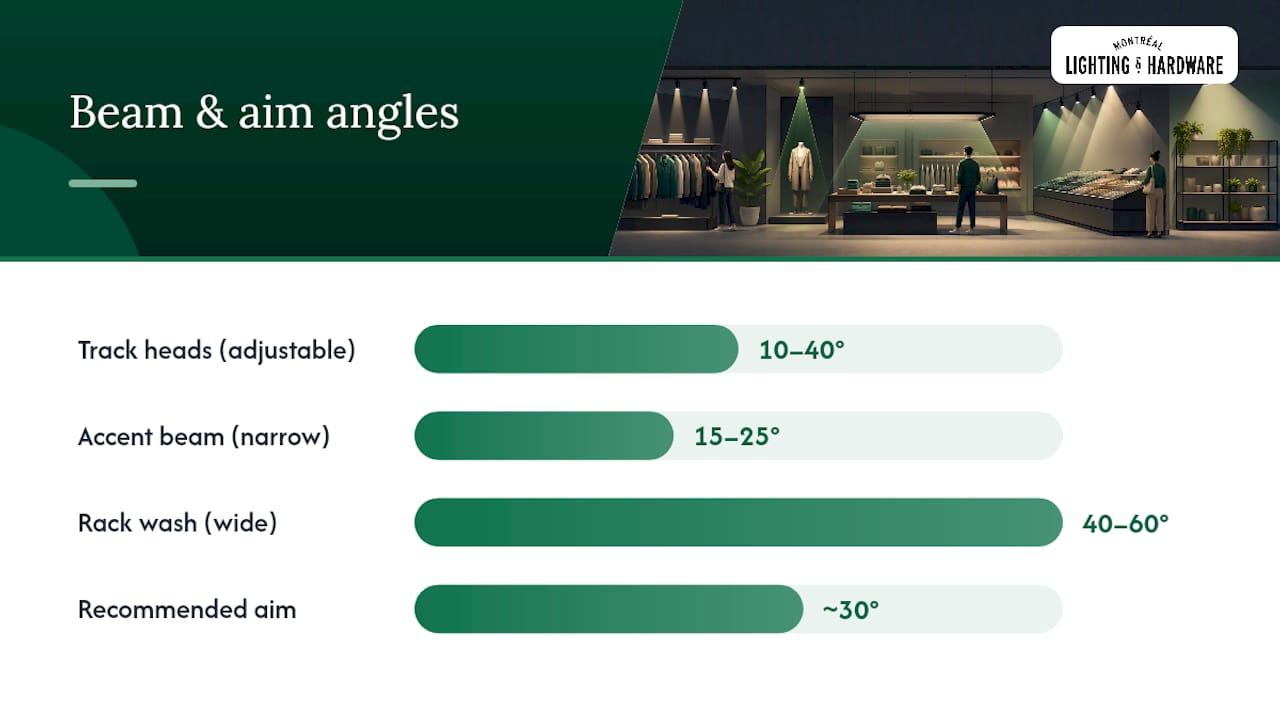
- Track heads: best for accent lighting on movable displays; choose adjustable beam angles (10 to 40 degrees) so one head can go from a tight spotlight to a broader wash without a fixture swap.
- Recessed downlights: efficient for ambient coverage in fixed-ceiling stores; space according to ceiling height and beam spread to avoid dark gaps between fixtures.
- Linear fixtures: ideal for aisle washing and perimeter walls; pair with a diffuser lens to soften the line of light and cut visible hot spots.
- Pendants: reserved for decorative impact over cash wraps, islands, or seating areas; a piece like the Sonneman Light Guide Ring pendant doubles as a sculptural anchor and a soft ambient source.
- Shelf and case strip lighting: best for jewelry, cosmetics, and glassware; use warm dimmable strips with a diffuser channel rather than bare LED tape to avoid visible dots.
Glare control separates a comfortable store from an uncomfortable one, and it comes down to two variables: beam angle and aiming angle. A narrow 15 to 25 degree beam concentrates punch on a single product, while a 40 to 60 degree beam is better suited to washing a whole rack. Manufacturer guidance recommends keeping unified glare rating (UGR) low and using diffusers or louvers so customers never get a direct line of sight into a bare LED chip. As a rule of thumb, aim accent fixtures at roughly a 30-degree angle from vertical. Anything steeper throws harsh shadows across faces and merchandise; anything flatter creates disc-shaped glare on the floor.
Before you commit to a fixture family, check driver and control compatibility. Not every LED driver plays nicely with every dimmer, and mismatched components are the single most common cause of flickering or buzzing fixtures during a retrofit. Choose fixtures with accessible drivers, ideally serviceable from below the ceiling rather than requiring a full fixture pull, since retail ceilings get touched far more often than residential ones during seasonal resets.
Color Temperature and CRI Rules by Store Type
Color temperature should match the emotional register of what you are selling, and getting it wrong is one of the fastest ways to make good merchandise look cheap. Warm white in the 2,700K to 3,000K range suits boutiques, luxury goods, and anywhere skin tones and fabric warmth matter to the sale. Neutral white in the 3,500K to 4,000K range works for general apparel and mixed-merchandise stores where you want clarity without a clinical edge. Cool white in the 4,000K to 5,000K range fits grocery, electronics, and other high-visibility environments where crispness and alertness matter more than warmth.
CRI (color rendering index) matters just as much as temperature, and it is the spec most stores underinvest in. Industry guidance calls for CRI 90 or higher as the baseline for nearly every retail application, with jewelry, cosmetics, and fitting rooms pushed to CRI 95 and above. Below CRI 90, reds go dull, skin tones look sallow, and customers subconsciously distrust what they are seeing, even if they cannot name why.
For color-critical zones, look past the single CRI number toward TM-30 metrics, specifically R9, which measures how accurately a light source renders saturated reds. A fixture can hit CRI 90 overall while still rendering R9 poorly, which shows up as lifeless reds on clothing and produce. Ask your fixture supplier for TM-30 data sheets, not just a CRI number on the box, when you’re speccing anything with strong reds: produce displays, red-soled shoes, cosmetics counters.
The mistake that undoes even a well-planned scheme is mixing color temperatures within the same sightline. A 3,000K accent next to a 4,000K ambient wash reads as two different rooms fighting each other, and customers notice the mismatch even when they cannot explain it. Pick one CCT family per zone and hold the line across every fixture a customer can see at once, including any daylight spilling in from storefront glazing.
Setting Light Levels by Zone
Getting brightness right zone by zone matters more than any single fixture choice, because a store that is uniformly bright everywhere is, paradoxically, the hardest one to shop in. Circulation paths need enough light to move safely and read signage, but should sit noticeably below display and accent zones so the eye has somewhere brighter to travel toward.
Practitioner-level spec targets commonly used by lighting consultancies break down like this:
| Zone | Recommended illuminance | Notes |
|---|---|---|
| Circulation / walkways | 100 to 200 lux | Even coverage; avoid dark transition zones near entries |
| General merchandise / ambient | 300 to 500 lux (30 to 50 foot-candles) | Baseline retail floor level for most apparel and specialty stores |
| Vertical illuminance on garments | 750 to 1,000 lux | Measured on the face of the display, not the floor |
| Hero displays / mannequins | 2,500 to 4,500 lux | Narrow-beam accent only; creates the contrast ratio that pulls customers in |
| Fitting rooms | 500 lux at face height | Flattering, high-CRI, dimmable |
| Checkout / cash wrap | 300 to 500 lux (30 to 50 foot-candles) | Enough for signature capture and card transactions without glare |
| Window displays | 1,500 to 3,000 lux | Must compete with daylight and streetlights, especially at dusk |
A basic light meter, sold cheaply through electrical suppliers, gives far more reliable readings than a smartphone app. Phone sensors vary wildly between models and are not calibrated, so treat any phone reading as a rough directional guide rather than a number to design around. Take readings at the actual product face for vertical illuminance, not the floor, since floor lux and garment lux can differ by a wide margin under the same fixture.
Commissioning matters as much as the spec sheet. Fixtures almost always need re-aiming after install, once the merchandise, fixtures, and store furniture that will absorb or reflect that light are actually in place. Walk the floor at night with the doors closed and lights on, note glare hot spots and dark corners, then adjust before you consider the job finished.
High-ROI Fixes: Fitting Rooms, Hero Displays, and Windows
If your lighting budget is limited, spend it here first. These three interventions consistently move the needle more than any blanket upgrade to overall store brightness, according to retail lighting case findings that point to targeted fixes over wholesale brightness increases.
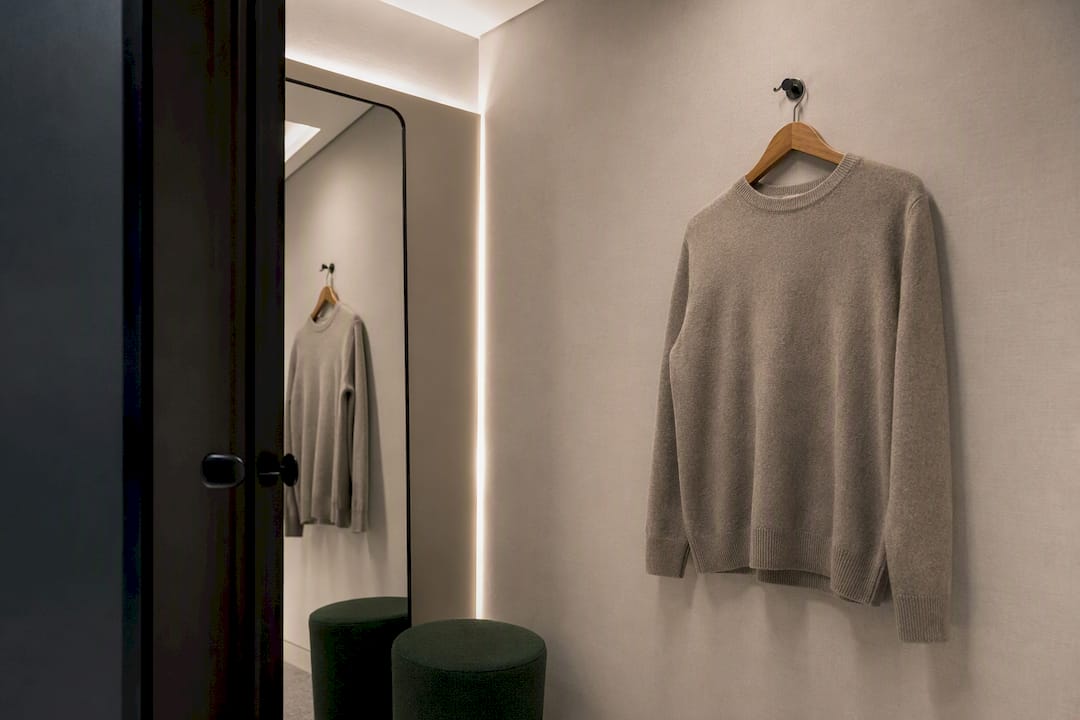
- Relight fitting rooms with a three-source scheme. Dual side or portrait-style lighting flanking the mirror, paired with a soft overhead fill and a dimmable scene switch, is the combination designers reach for most when conversion in the fitting room is the goal. Overhead-only lighting casts shadows under the eyes and chin that make almost anyone look tired; side lighting fills those shadows and flatters skin tone instead of fighting it.
- Give hero displays a real accent ratio, not just a brighter bulb. Aim narrow-beam, high-CRI accents at mannequins and feature tables to hit that 2,500 to 4,500 lux target, then let the ambient floor level around it stay comparatively dim. The contrast, not the raw brightness, is what makes customers stop walking.
- Treat window displays as a scheduled performance, not a static setup. Daylight overwhelms most interior window lighting during midday, so schedule brighter accent scenes for dusk and evening when your window becomes the brightest thing on the block. Use anti-glare optics or a slight downward aim on window-facing fixtures so passersby see the merchandise, not a blinding reflection off the glass.
Pro Tip: Before you touch a single fixture, take “before” photos of your three weakest-performing displays at eye level. After you re-aim and relamp, shoot the same angle again. The side-by-side comparison sells the value of the change to anyone on your team who is skeptical about spending on lighting.
Fitting rooms in particular tend to get ignored during store buildouts because they are small, low-visibility spaces. That is exactly why they are underpriced opportunity: a modest investment per fitting room in better bulbs and a dimmer switch routinely outperforms a much larger spend on general sales-floor lighting.
Controls, LEDs, and Real Operating Costs
LED conversion is the easiest energy decision a retailer will make this decade. LED fixtures typically draw 50 to 75 percent less energy than the fluorescent or HID fixtures they replace, and they last considerably longer, which cuts the maintenance visits and ladder time that eat into staff hours during business hours.
Controls are where the real day-to-day savings and flexibility live. A basic photosensor dims perimeter fixtures near storefront glazing as daylight shifts, cutting energy without anyone touching a switch. Simple zoned dimming, splitting the sales floor into a handful of independently controlled circuits, lets staff drop ambient light after close while keeping security and merchandising accents running. For multi-site operators or stores that change scenes frequently (a boutique running a seasonal promotion, a showroom hosting an event), a networked system like DALI or Casambi allows scene presets to be programmed once and recalled with a single tap, rather than manually adjusting dozens of dimmers.
Match the control complexity to the operation. A single-location boutique rarely needs a full networked system; a simple wall-station scene controller with three or four presets (open, promotion, closing, cleaning) covers most needs at a fraction of the cost. A multi-site chain, on the other hand, benefits from centralized control that lets a regional manager push the same scene changes across every location at once.
A few practical scene examples worth setting up regardless of scale: an “open” scene at full brightness for morning setup, a “selling” scene with accents at full punch and ambient dimmed slightly for the working day, and a “cleaning” scene that brings everything to full uniform brightness for closing tasks and restocking.
Common Retail Lighting Mistakes and Quick Fixes
Most underperforming retail lighting is not broken. It is just miscalibrated, and the fixes are often cheaper than a full redesign.
- Uniform, too-bright ambient light with no contrast. The fix: dim the ambient layer by 20 to 30 percent and add narrow-beam accents on your top three merchandising zones so the eye has somewhere to go.
- Low CRI fixtures making colors look flat or off. The fix: swap lamps for CRI 90+ (or 95+ in color-critical zones) before assuming the merchandise or the paint color is the problem; a cheap CRI 80 lamp can make an expensive product look bargain-bin.
- Mismatched color temperatures within one sightline. The fix: audit every fixture visible from a customer’s typical vantage point and standardize on one CCT family per zone.
- Glare off glossy floors, glass cases, or mirrors. The fix: adjust aiming angle first (try steeper or shallower before replacing anything), add a diffuser lens, or switch to a fixture with a deeper baffle. Canadian accessibility guidance on wayfinding also flags glare and contrast as functional barriers, not just aesthetic ones, which is worth remembering near entries and signage.
- Dead spots between recessed fixtures. The fix: check spacing against ceiling height; a rough rule is spacing no more than the mounting height above the floor, tightened further in lower ceilings.
- Fixtures never re-aimed after the initial install. The fix: put a recurring calendar reminder to walk the floor after any merchandising reset, since displays move but accent lighting rarely follows without a prompt.
Finishes play into this too. Glossy tile, polished chrome fixtures, and glass cases all bounce light in ways matte surfaces do not, so if you’re renovating alongside a lighting refresh, factor reflective finishes into your aiming plan rather than treating lighting and interior finish decisions separately.
A One-Day Lighting Test You Can Run This Week
You do not need a contractor to find out how much of your current lighting is underperforming. A single afternoon and a basic light meter will tell you most of what you need to know.
- Survey and measure first. Walk the floor with a light meter and record readings at circulation paths, general merchandise areas, and your top three display zones. Write the numbers down; memory is unreliable once you start comparing “before” and “after.”
- Swap bulbs in your weakest zone. Pick the display or rack that seems dullest and swap in a higher-CRI (90+) LED lamp at the same wattage. Take a new reading and a photo.
- Re-aim every accent fixture you can reach. Track heads drift over time from cleaning, restocking, and simple gravity; a five-minute re-aim often restores contrast that a store lost months ago without anyone noticing.
- Set up one basic dimming scene. Even a $30 to $60 smart dimmer or wall-station scene controller lets you drop ambient light 20 percent after close, testing the energy and mood difference before committing to a full control system.
- Log before/after photos and readings. Shoot the same angle and note the lux reading each time. This record is what justifies a bigger lighting budget to a business partner or landlord later.
- Decide what needs a professional. If dead spots, flicker, or driver compatibility issues show up during your test, that is the signal to call a lighting professional rather than keep swapping parts. When you do, ask for beam-angle and CRI specs in writing, request a TM-30 R9 value for any color-critical zone, and get a fixture-by-fixture aiming plan, not just a materials list.
Montreal Lighting & Hardware’s Take on Getting This Right
Store owners come to us assuming they need to replace every fixture on the ceiling. Almost never true. The most common request we get from designers and store owners alike is for a handful of high-CRI accent heads and a warmer fitting-room lamp, not a full retrofit, and that request usually solves the problem they walked in with.
Our trade program gives design professionals and store owners access to quick-ship accent fixtures and decorative pendants, including pieces from well-known brands, at special pricing, so a fitting-room relight or a hero-display fix can proceed efficiently. If you are planning a broader lighting overhaul alongside a remodel, our restaurant lighting design guide walks through scene programming and layered zoning in more depth, and it translates well to retail floors with similar layout logic. Trade professionals working on active specs are welcome to reach out directly through our showroom for product selection help.
— Montreal Lighting & Hardware
Source Fixtures and Get Trade Pricing at Montreal Lighting & Hardware
The company stocks accent-ready fixtures this guide keeps pointing to: adjustable track heads, decorative pendants, and case-lighting components from designer lines, backed by a trade program that gives design professionals special pricing instead of retail markup.

If you are ready to relight a fitting room or add a hero-display accent, start with a decorative anchor piece like the Sonneman Meclisse LED pendant, which works as both a task and ambient fixture over a fitting-room seating area or cash wrap. For a sculptural focal point over a feature table, the Sonneman Light Guide Ring pendant delivers soft ambient wash with visual presence. Visit the Montreal Lighting & Hardware showroom, browse the trade program details online, or request a quote to get spec-ready pricing on the fixtures your store actually needs.
Sources
- CAN/ASC-24 wayfinding and signage — general requirements: lighting and contrast
- Retail store lighting design: How to increase sales — 1000Bulbs Blog
FAQ
What is the best lighting for a retail store?
The best approach layers moderate ambient light (300 to 500 lux) with bright, narrow-beam accents on hero displays (2,500 to 4,500 lux), using CRI 90+ LEDs and simple dimming controls to create contrast rather than uniform brightness.
What is the 5’7" lighting rule?
The “5 foot 7 inch” rule refers to positioning accent lighting to hit merchandise and mannequins at roughly average adult eye height, around 5’7", so the brightest, most color-accurate light lands where a customer’s gaze naturally goes rather than washing the floor or ceiling.
What are the latest trends in commercial lighting?
Commercial lighting has moved past simply raising overall brightness toward controlling vertical illuminance, spectral quality, and narrow-beam contrast that guides customer attention, paired with networked dimming controls for flexible scene changes.
What are the lighting trends for 2026?
Retailers are prioritizing high-CRI and TM-30-rated fixtures for color-critical zones, scene-based controls like DALI and Casambi for multi-site consistency, and targeted fixes such as fitting-room relighting over blanket brightness increases, since small, well-aimed changes tend to outperform wholesale lighting overhauls.
Do I need a lighting designer, or can I DIY these changes?
Many quick wins, like re-aiming accents, swapping to higher-CRI lamps, and adding a basic dimming scene, are DIY-friendly with a light meter and an afternoon; call a professional once you’re dealing with driver compatibility issues, complex networked controls, or color-critical zones like jewelry cases that need documented TM-30 data.
