


Dark sky lighting is outdoor illumination designed to direct light downward, onto the surfaces where it’s actually needed, while minimizing sky glow, light trespass, and glare. Fairfax County’s environmental office describes it simply: control the direction, intensity, and spectral output of every fixture. The three measurable goals are:
- Reduce sky glow — the orange haze that washes out stars above cities and suburbs
- Eliminate light trespass — light spilling onto neighboring properties or into windows
- Cut glare — harsh, unshielded brightness that actually reduces visibility
DarkSky International and the Illuminating Engineering Society (IES) jointly set the standards most Canadian municipalities now reference. Montreallighting stocks fixtures from Crystorama, Savoy House, and Maxim that align with these principles, making it a practical Canadian starting point for any project.
Table of Contents
- Why dark sky lighting matters for your home and project
- Core design principles: treat the system, not just the fixture
- What to look for in fixtures: specs, certifications, and Canadian options
- Controls, installation, and commissioning checklist
- Canadian regulations, model standards, and future-proofing your install
- Typical costs and timeline for a residential dark-sky upgrade
- Quick buying checklist: questions to ask vendors and installers
- How Canadian seasons and weather affect dark sky lighting performance
- Key Takeaways
- A note from the Montreallighting team
- Montreallighting makes it easy to shop dark-sky-friendly fixtures in Canada
- Further reading and authoritative sources
Why dark sky lighting matters for your home and project
Better-targeted light improves perceived safety while using fewer lumens. That’s the core trade-off: quality over quantity. DarkSky International estimates that a significant portion of outdoor lighting in the U.S. is wasted, causing considerable financial cost and environmental impact. Canadian figures follow a similar pattern.
The benefits extend well beyond energy bills:
- Human health: Blue-rich light at night suppresses melatonin and disrupts circadian rhythms. Warmer spectra (under 3000K) reduce that effect.
- Wildlife protection: Migratory birds, insects, and marine species are all sensitive to artificial light at night. Amber and warm-white fixtures cause far less disruption.
- Neighborhood aesthetics: Soft, downward-directed light creates a calmer, more inviting outdoor atmosphere than harsh floodlights.
- Property value: Thoughtfully lit exteriors photograph better and signal quality craftsmanship to buyers.
Pro Tip: Before swapping any fixture, add a timer or motion sensor. Controls alone can cut nighttime energy use significantly, even with your existing hardware.
Core design principles: treat the system, not just the fixture
The fixture is only one piece. DarkSky International’s guidance is clear: even a fully shielded luminaire can pollute if mounted at the wrong angle, set too bright, or left uncontrolled. Think of the whole system: fixture, placement, controls, and surface materials together.
DarkSky International and the IES jointly defined the Five Principles for Responsible Outdoor Lighting:
- Useful: Light only what genuinely needs illumination
- Targeted: Direct light precisely where it’s needed, with full cutoff or shielding
- Low level: Use the minimum lumen output that safely serves the task
- Controlled: Add timers, dimmers, or motion sensors to reduce output when areas are unoccupied
- Warm colored: Keep correlated color temperature (CCT) at or below 3000K
Mounting height and aim angle matter more than most designers expect. A wall sconce tilted even slightly upward can send a meaningful fraction of its output above the horizontal plane, undoing the shielding benefit. Surface reflectance is another overlooked factor: light-colored concrete, white gravel, or highly reflective cladding can bounce directed light back skyward, reintroducing glow even when the fixture itself is compliant.
Pro Tip: Always include a commissioning step with on-site lux readings or photometric checks. What looks right at the drawing stage often needs adjustment once surfaces and foliage are in place.
What to look for in fixtures: specs, certifications, and Canadian options
Choose fixtures that show real photometric data, carry a BUG rating, stay at or below 3000K CCT, and support dimming. That combination gives you a verifiable baseline before anything goes on the wall.
Key spec sheet items to verify:
- BUG rating (Backlight, Uplight, Glare): look for B1-U0-G0 or similar low values
- Lumen output: matched to the task, not maximized
- Beam angle: narrow for accent, wider for area coverage, always shielded
- CCT: 2700K–3000K for most residential use; amber (560 nm+) for ecologically sensitive zones
- IP rating: IP65 minimum for exposed Canadian outdoor locations
- Dimming compatibility: 0–10V or TRIAC, confirmed against your control system
- Mounting options: wall, post, or ceiling, with shielding geometry verified per location
The DarkSky Approved certification is the primary seal to look for. It requires independent third-party photometric testing, limits uplight, enforces dimming to 10% or less of full output, and caps CCT at 3000K. A retailer’s claim of “dark-sky friendly” is not the same thing.
| Fixture type | Shielding | Recommended lumens | CCT | Controls |
|---|---|---|---|---|
| Wall mount (entry/path) | Full cutoff | — | 2700–3000K | Dimmer + timer |
| Post/lantern (driveway) | Full cutoff or partial shield | — | 2700–3000K | Astronomical timer |
| Ceiling mount (porch) | Downward only | — | 2700–3000K | Motion + dimmer |
| Commercial area light | Full cutoff, shielding option | Per IES task level | ≤3000K | Zoned dimming |
Montreallighting carries Crystorama, Savoy House, and Maxim lines. The Crystorama Glacier lantern post and Capsule wall mount are good starting points for residential projects where shielded geometry and warm finishes matter.
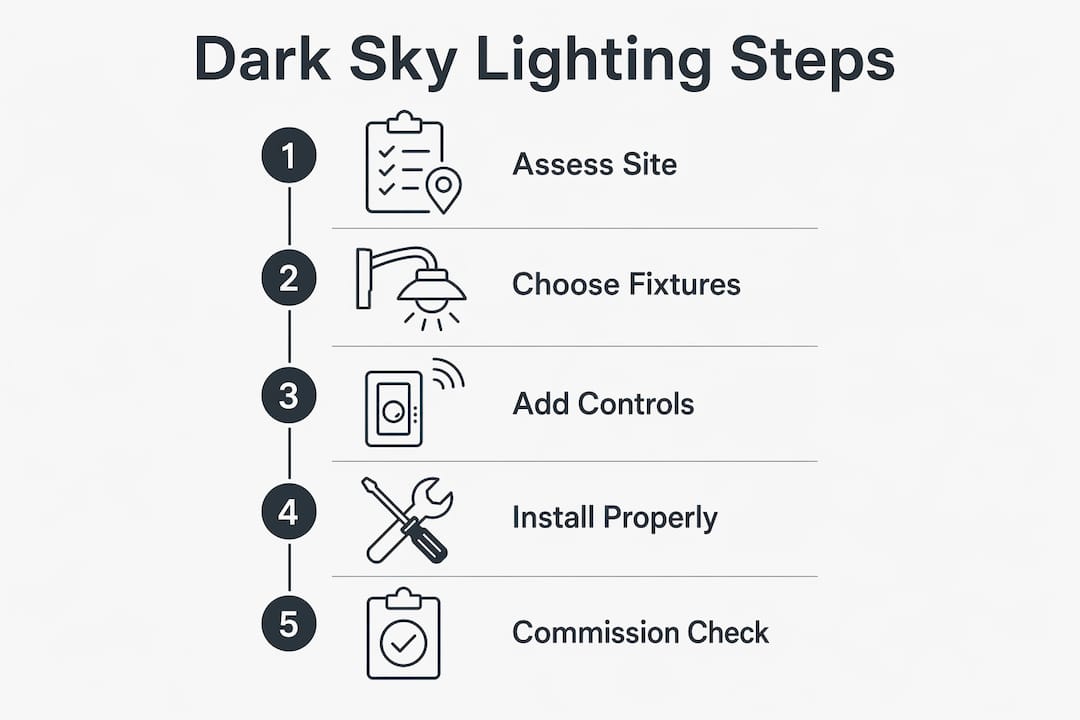
Controls, installation, and commissioning checklist
Controls and commissioning are not optional extras. A perfectly specified fixture installed at the wrong height, aimed incorrectly, or left burning at full output all night fails on every dark-sky metric.
Control types and when to use each:
- Astronomical timers: automatically adjust on/off times as sunrise and sunset shift through Canadian seasons
- Motion sensors: ideal for low-traffic areas; reduce output or shut off when no one is present
- Zoned dimming: lets you step down lumen output after peak hours, a common municipal requirement
- Smart integration: useful for larger residential or commercial projects where schedules need remote adjustment
Installation checklist:
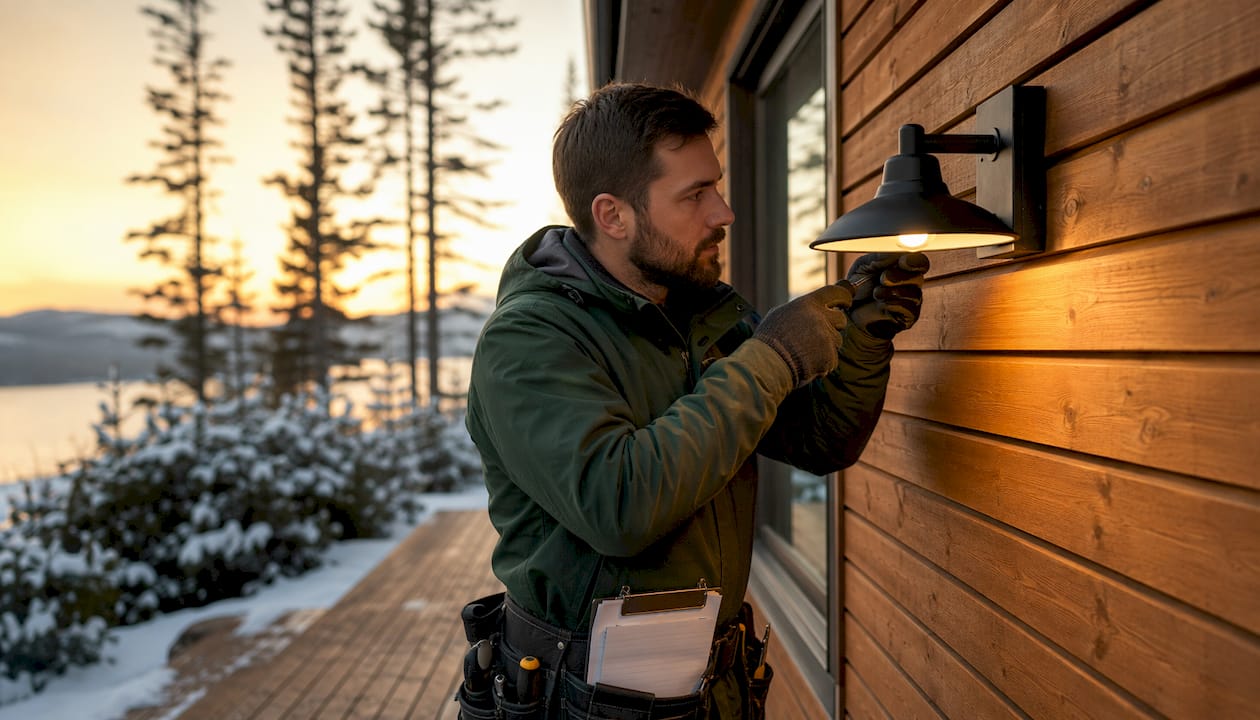
- Verify mounting height and angle against photometric plan before fastening
- Confirm shielding geometry blocks uplight at the installed position
- Test dimming range down to 10% or less of full output
- Set timers or astronomical clock to local coordinates
- Document all settings with photos before closing walls or conduit
Commissioning checklist:
- Take on-site lux readings at task surfaces and at property boundaries
- Photograph the fixture from ground level to confirm no uplight is visible
- Record fixture model, CCT, lumen output, and control settings
- File datasheets and commissioning photos for permit records and future resale
Pro Tip: Require your installer to hand over a simple commissioning report: two or three photos showing aim and cutoff, plus a note of the timer settings. It takes ten minutes and protects you if a bylaw inspector visits later.
Canadian regulations, model standards, and future-proofing your install
Adopt DarkSky/IES guidelines and document everything. That’s the single most effective way to stay ahead of tightening bylaws across Canada.
The IES Model Lighting Ordinance (MLO), developed with DarkSky International, is the framework most Canadian municipalities draw from when writing or updating outdoor lighting bylaws. Municipalities in British Columbia, Ontario, and Quebec have been progressively tightening lumen caps, CCT limits, and uplight restrictions. Choosing DarkSky Approved luminaires now lowers the risk of costly rework when those thresholds tighten further.
Municipal inspectors typically look for:
- Uplight limits (often zero uplight above 90°)
- Total lumen caps per zone or property type
- CCT restrictions (commonly ≤3000K for new installations)
- Timer or control requirements for commercial properties
To find your local bylaw, search your municipality’s name plus “outdoor lighting bylaw” or “light pollution ordinance.” Many Canadian cities also publish dark-sky or light pollution policies through their planning or environment departments.
DarkSky’s policy guidance points to municipal case examples showing that a well-written ordinance combined with quality lighting design can reduce energy use and light pollution simultaneously.
Pro Tip: Retain your technical datasheets and commissioning records. They support permit applications, demonstrate compliance during property inspections, and add a verifiable quality signal when you sell.
Typical costs and timeline for a residential dark-sky upgrade
Costs vary with control complexity, product tier, and commissioning requirements. Prioritize controls and proper aiming first; those two factors deliver the best return on any budget.
Key cost drivers:
- Fixture tier: Entry-level shielded fixtures cost less upfront but may lack dimming or precise photometry; mid-range and designer fixtures from brands like Crystorama or Savoy House typically include better optical control
- Controls: Astronomical timers add modest cost; smart zoned dimming systems cost more but offer the most flexibility
- Electrical work: Rewiring for new mounting positions or adding dedicated circuits is often the largest variable
- Commissioning: A brief site visit for lux readings and documentation adds cost but prevents compliance issues later
Sample project timeline:
- Planning and site survey (1–2 weeks)
- Product selection and specification (1 week)
- Ordering and lead time (1–4 weeks depending on product availability)
- Installation (1–3 days for a typical residential project)
- Commissioning, documentation, and permit filing (1–2 days)
Pro Tip: Schedule commissioning at the end of a seasonal window, ideally after leaves have fallen or before spring growth fills in. Foliage changes light distribution more than most people expect, and a late-autumn check catches problems that a summer install would miss.
Quick buying checklist: questions to ask vendors and installers
Ask for datasheets, BUG ratings, CCT and dimming specs, mounting details, and commissioning deliverables before you commit to any fixture or contractor.
Top questions to ask your vendor:
- Does this fixture carry the DarkSky Approved seal, or can you provide third-party photometric test data?
- What is the BUG rating, and what is the uplight (U) value specifically?
- What CCT options are available, and is 2700K or 3000K in stock?
- Is the fixture dimmable to 10% or less, and which dimmer protocols does it support?
- What is the IP rating, and is it rated for Canadian winter conditions?
- What warranty does the manufacturer offer, and is it honored in Canada?
Questions to ask your installer:
- Will you provide a commissioning report with photos and lux readings at handover?
- How do you verify mounting angle and shielding geometry on site?
- Can you program astronomical timers to local coordinates?
- Will you document control settings for permit and resale records?
When verifying a DarkSky Approved seal, cross-reference the product on DarkSky International’s searchable database rather than relying on a retailer’s label alone. Request installation documentation in writing before the project closes.
How Canadian seasons and weather affect dark sky lighting performance
Canada’s climate creates real performance variables that don’t appear in a spec sheet. Snow cover, for example, dramatically increases surface reflectance: a fixture aimed correctly in October can produce noticeable sky glow in January when fresh snow reflects light back upward. Adjust lumen output downward in winter months if your control system allows it.
Extreme cold affects LED driver performance and dimming behavior. Most quality fixtures rated for Canadian outdoor use specify operating temperatures down to -40°C, but dimming range can narrow in very cold conditions. Verify the driver’s low-temperature dimming spec before purchasing.
Seasonal foliage changes the effective distribution of post and wall fixtures. A lantern post that reads as fully shielded in July may cast wider light in November once surrounding shrubs lose their leaves. Commissioning in late autumn, or re-checking after the first significant snowfall, catches these shifts before they become bylaw issues. Astronomical timers are especially valuable here: they automatically compensate for Canada’s dramatic variation in sunrise and sunset times across the year, keeping your lighting schedule accurate without manual resets.
Key Takeaways
Choosing DarkSky Approved fixtures, pairing them with proper controls, and commissioning the installation with documented lux readings is the most reliable path to compliant, beautiful outdoor lighting in Canada.
| Point | Details |
|---|---|
| Choose certified fixtures | Look for the DarkSky Approved seal and verify BUG ratings; retailer claims alone are not sufficient. |
| Keep CCT at or below 3000K | Warmer spectra protect human health, wildlife, and comply with most Canadian municipal limits. |
| Controls are non-negotiable | Astronomical timers and motion sensors often matter more for compliance than fixture choice alone. |
| Commission and document | On-site lux readings and commissioning photos protect you during inspections and property transactions. |
| Montreallighting as your Canadian source | Montreallighting stocks Crystorama, Savoy House, and Maxim fixtures with trade support and fast shipping across Canada. |
A note from the Montreallighting team
Montreallighting recommends dark-sky principles for every outdoor project and stocks fixtures designed to meet them. The brands we carry, including Crystorama, Savoy House, and Maxim, offer shielded designs, warm CCT options, and dimming compatibility that align with DarkSky International guidance. Our trade program gives designers and contractors access to exclusive pricing, project support, and a team that understands Canadian climate and compliance requirements. If you’re working through a spec or need help matching a fixture to a specific mounting condition, reach out to us directly. We’re glad to help you find something that works beautifully and responsibly.
Montreallighting makes it easy to shop dark-sky-friendly fixtures in Canada
Montreallighting is your Canadian source for shielded outdoor fixtures that meet dark-sky principles without sacrificing style. The Crystorama Glacier and Capsule lines offer warm finishes, downward-directed optics, and dimming compatibility right out of the box, so you spend less time cross-referencing spec sheets and more time on the design itself.

Whether you’re a homeowner replacing a single entry fixture or a contractor specifying a full exterior package, Montreallighting’s trade program offers exclusive pricing and project guidance tailored to your needs. Browse the outdoor fixture collection or go straight to the Crystorama Capsule ceiling mount to see shielded options available now with fast Canadian shipping. Ready to get started? Visit Montreallighting to request a trade quote or explore the full range.
Further reading and authoritative sources
- DarkSky International: Five Principles for Responsible Outdoor Lighting — the foundational design framework for any dark-sky project
- DarkSky Approved Luminaires Program — certification criteria, program details, and the searchable product database
- DarkSky Approved Luminaires Guidelines — full technical criteria including uplight limits, CCT caps, and dimming requirements
- DarkSky International: Outdoor Lighting for Policy Makers — municipal case examples and the environmental cost of wasted lighting
- Fairfax County: Dark Sky Lighting Explainer — a clear, accessible overview of goals and definitions
Check your local municipality’s planning or environment department website for current outdoor lighting bylaws. Save your fixture datasheets and commissioning records alongside your permit documents — they’re worth keeping for the life of the installation.
Recommended
- Montreal Lighting & Hardware | Canada’s Lighting Experts
- Capsule One Light Outdoor Ceiling Mount | Crystorama – Montreal Lighting & Hardware
- Dakota Eight Light Ceiling Mount | Crystorama – Montreal Lighting & Hardware
- Glacier One Light Outdoor Lantern Post | Crystorama – Montreal Lighting & Hardware
