


Cove lighting is hidden, indirect lighting tucked into a ceiling recess or ledge so the fixture disappears and only a soft, bounced glow remains. It reduces harsh shadows and can make rooms feel larger, which is why it works so well layered over your regular fixtures instead of replacing them. If you want quick inspiration before the technical details, here are eight ideas worth trying:
- Perimeter tray ceiling — warm LED strip around a recessed ceiling edge for whole-room ambient wash.
- Headboard backlight — strip behind a floating headboard for a soft bedroom glow.
- Under-cabinet cove — slim strip beneath upper cabinets for kitchen prep light without glare.
- Stair riser glow — low-profile strips under treads for nighttime wayfinding.
- Mirror halo — IP-rated strip framing a bathroom mirror for even, shadow-free light.
- Floating shelf grazes — strip under shelving to highlight objects and add depth.
- Outdoor eave wash — IP65 strip along roof eaves for a soft porch or patio glow.
- Wardrobe top cove — strip along closet crown molding for a boutique-store feel.
Key Takeaways
Cove lighting works best when lip height, strip setback, and LED density are planned together, not chosen separately.
| Point | Details |
|---|---|
| Definition and purpose | Cove lighting hides the light source in a recess to bounce a soft glow off the ceiling. |
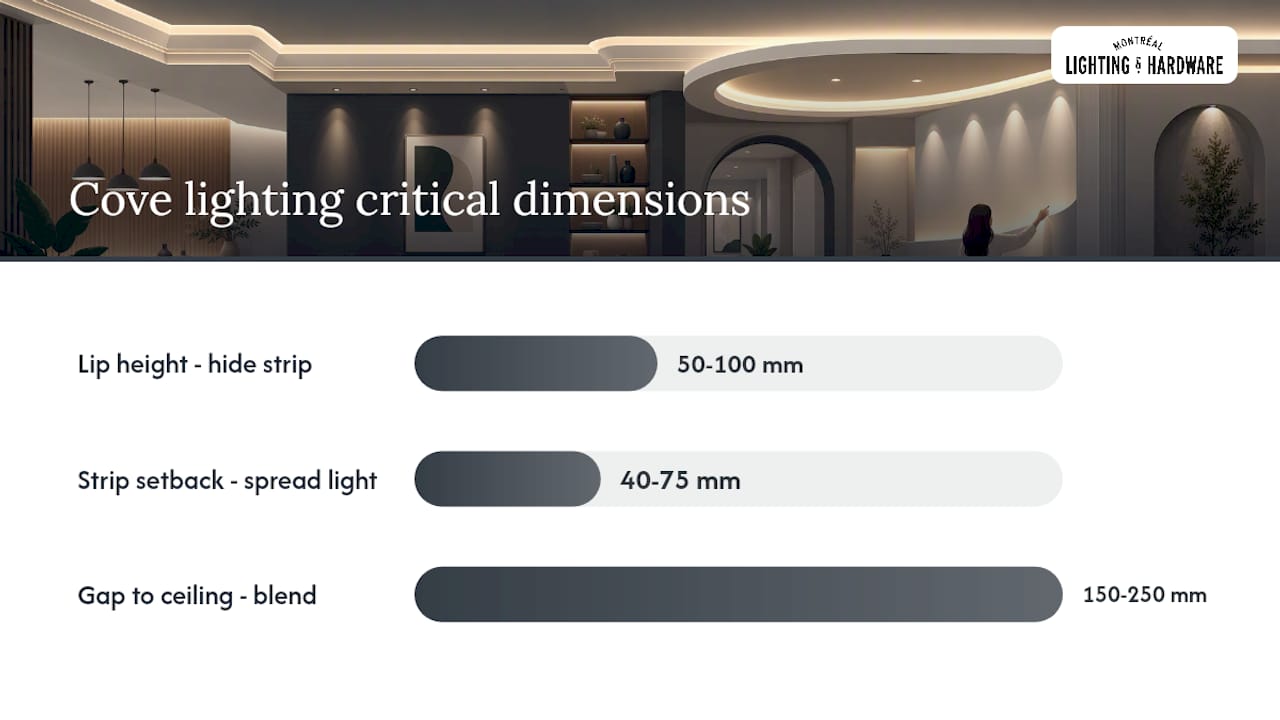
| Get the dimensions right | Aim for a 50 to 100mm lip, 40 to 75mm setback, and 150 to 250mm gap to avoid scalloping. |
| Match components carefully | Use CRI90+ strips, a compatible dimmable driver, and a diffuser to prevent flicker and visible dots. |
| Budget realistically | Expect $8 to $20 per meter for strips and one to two weekends for a full living room perimeter. |
| Source parts locally | Montreal Lighting & Hardware offers Canadian shipping, trade pricing, and fixtures to layer with your cove design. |
Table of Contents
- Why Choose Cove Lighting Design: Benefits and Tradeoffs
- Best LED Cove Lighting Components: Strips, Drivers, and Dimmers
- Cove Lighting Ideas for Every Room in Your Home
- How to Install Cove Lighting Without Visible Hot Spots
- DIY Cove Lighting Checklist: Materials, Costs, and Timeline
- Fixing Common Cove Lighting Problems
- Canada-Ready Cove Lighting Products and Where to Buy Them
- Get the Right Parts and Support for Your Cove Lighting Project
- Sources
Why Choose Cove Lighting Design: Benefits and Tradeoffs
Cove lighting earns its popularity because it does what harsh overhead fixtures can’t: it softens a room without flattening it. The light bounces off the ceiling, so you get a low-glare ambient wash that makes a space feel calmer and larger. It also emphasizes architecture, tracing crown molding, tray ceilings, or niches you’d otherwise overlook. With LEDs, it’s genuinely efficient, and it plays nicely with dimmers and smart controls for adjusting mood by time of day.
It has real limits, though. Cove lighting is not a substitute for task lighting. You still need reading lamps or under-cabinet task strips where you actually work. Poorly planned coves show visible LED dots or a scalloped, wavy pattern on the ceiling. And building a proper recess adds construction cost and complexity, especially in a renovation where ceiling framing isn’t already cove-ready.
Pro Tip: Think of cove lighting as your mood layer, not your only layer. Pair it with recessed downlights or table lamps for tasks, and let the cove handle the atmosphere.
Best LED Cove Lighting Components: Strips, Drivers, and Dimmers
Component choice makes or breaks a cove lighting design. Start with the LED tape itself: 12V strips are easier for short DIY runs and safer to handle, while 24V handles longer runs with less voltage drop, which matters for anything over 5 meters. Look for high LED density. Sparse strips create visible dots on the ceiling; denser ones blend into a continuous line. Ambient cove runs typically call for lower lumen output per meter than general-lighting runs, so match brightness to the room’s purpose, not just its size.
For color quality, aim for CRI90+ in any living space, since it renders skin tones and finishes more naturally, a point backed by research on LED cove lighting benefits. Stick to 2700 to 3000K for bedrooms and living rooms, and 3000 to 4000K for kitchens where task clarity matters more than mood.
Drivers matter as much as the strip. Use a dimmable driver that matches your dimmer’s protocol, whether TRIAC, 0-10V, or DALI. Mismatched pairs cause flicker, one of the most common cove lighting complaints.
Spec checklist before you buy:
- LED density (LEDs per meter) and rated lumens per meter
- CRI rating (90+ preferred)
- Color temperature (fixed or tunable)
- IP rating for the room’s moisture exposure
- Driver dimming protocol compatibility
Pro Tip: Place drivers where you can access them later, and derate their rated wattage by about 20% on long runs to avoid overheating.
Cove Lighting Ideas for Every Room in Your Home
Cove lighting design changes shape depending on the room, and the right component choice matters as much as the placement.
In the living room, a perimeter tray ceiling cove with warm 2700 to 3000K strips creates a soft glow that pairs naturally with recessed downlights for reading or gathering. Picture the ceiling edge glowing evenly around the whole perimeter, with a ceiling fixture like a Hulton ceiling mount handling the task layer below.
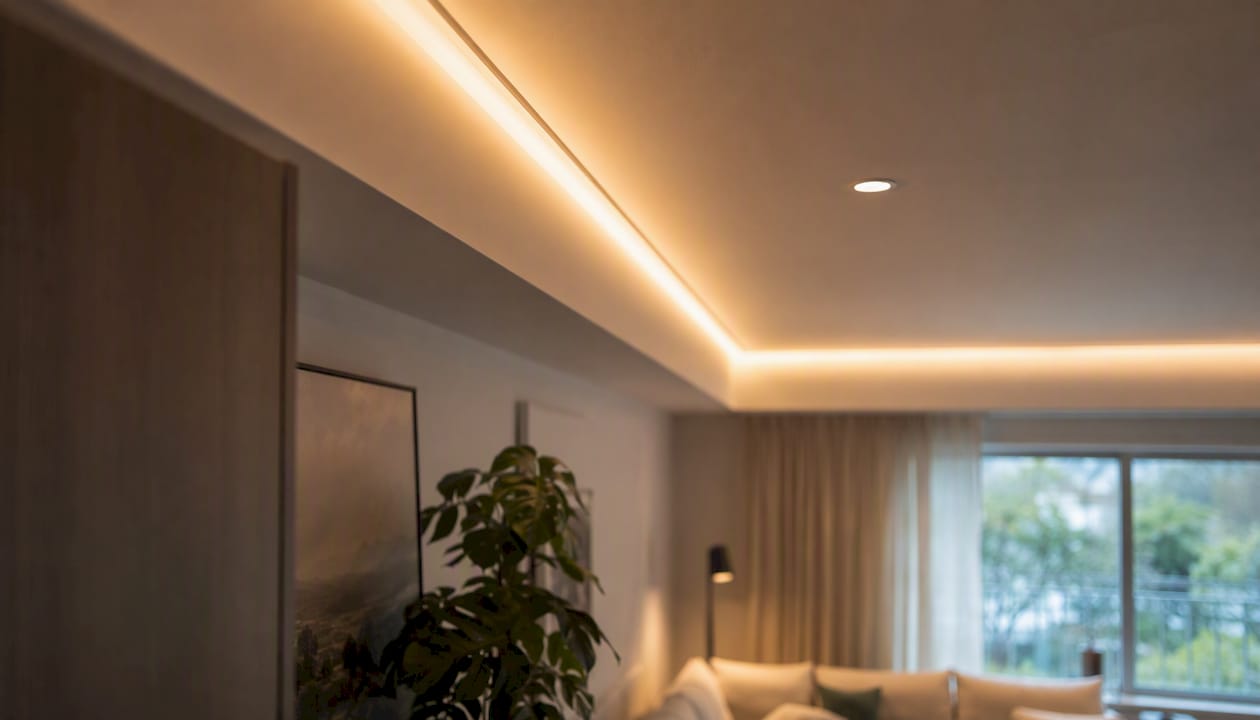
For bedrooms, a headboard backlight with tunable or warm-only strips on a dimmer gives you a gentle night mode. Try dimming it to its lowest setting as a nightlight, then bringing it up gradually for reading in bed.
In the kitchen, above-cabinet cove lighting bounces light off the ceiling for ambient fill, while under-cabinet strips at 3000 to 4000K give you clean, neutral light for prep work. Check for ETL or UL certification on any strip you install near cooking surfaces.
Bathrooms need IP-rated profiles, ideally IP65, around mirrors or ceiling trays where splash exposure is a real risk. A mirror halo effect, paired with a fixture from our bathroom vanity lighting guide, gives even, flattering light for grooming tasks.
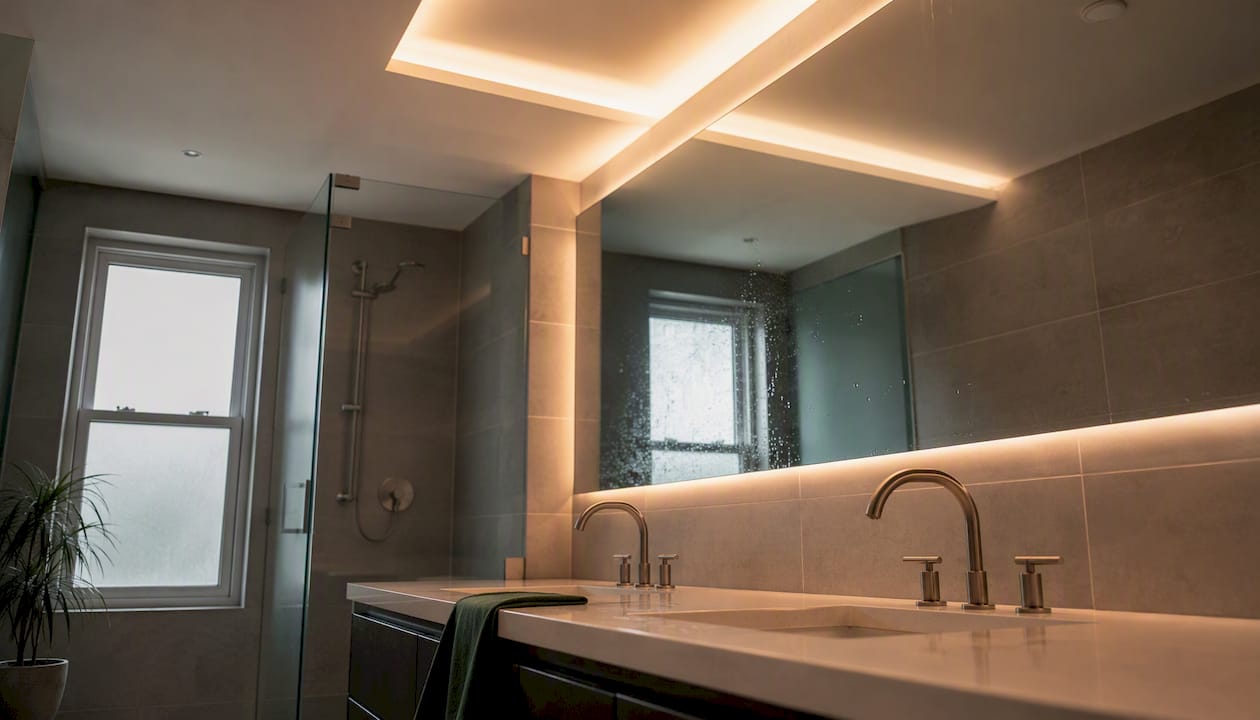
Hallways and staircases benefit from continuous low-level runs for wayfinding, often on motion sensors dimmed low overnight so you’re not blasted awake walking to the kitchen.
For accent uses, cove strips under floating shelves, along wardrobe crown tops, or tucked into display niches create a boutique-store glow. Outdoors, IP-rated strips along eaves extend that same soft wash to your porch or patio.
How to Install Cove Lighting Without Visible Hot Spots
Getting a smooth cove wash instead of a scalloped or dotty ceiling comes down to geometry. The design rules that separate a clean cove from a messy one center on three measurements: lip height, strip setback, and the gap between the ledge and ceiling. A lip of roughly 50 to 100mm hides the strip from both seated and standing sightlines. Setback of about 40 to 75mm and a gap of 150 to 250mm give the light room to spread and blend before it hits the ceiling, which is what prevents that wavy scalloped pattern.
Denser LED strips and a frosted diffuser do the rest of the work, blurring individual LEDs into one continuous line rather than a string of dots. Where ceiling height is tight, an angled or fan-shaped profile helps the light spread and blend before reaching the ceiling, even in a shallow recess.
Choose recessed profiles for a built-in look or surface-mounted channels for retrofits, and plan corners carefully so the strip runs continuously rather than stopping and restarting, which leaves dark gaps. In tight profiles, ventilation matters too. LEDs generate heat, and a sealed channel with no airflow shortens their lifespan. For long runs, use amplifiers or additional power injection points rather than pushing one driver past its rated distance.
Pro Tip: The single most common DIY mistake is a lip that’s too shallow or a strip mounted too close to the ceiling. If you can see the LED dots or a raw strip edge from across the room, add depth to the lip or increase the setback.
DIY Cove Lighting Checklist: Materials, Costs, and Timeline
Here’s the order that keeps a DIY cove lighting project from turning into a wiring headache:
- Measure your recess length, height, and available depth.
- Select strip voltage, density, CRI, and IP rating for the room.
- Choose a matching profile and diffuser.
- Plan your run layout and locate the nearest power source.
- Order parts, including extra connectors for corners.
- Bench-test the strip and driver before mounting anything.
- Install the channel, then the strip.
- Wire the driver and dimmer, or book a licensed electrician for mains work.
- Seal joints and snap the diffuser into place.
Typical Canadian costs for mid-range components:
- LED strip: roughly $8 to $20 per meter
- Aluminum profile with diffuser: $10 to $25 per meter
- Dimmable driver: $30 to $80 depending on wattage
- Connectors and corner pieces: $5 to $15 each
A single small room usually takes a full day for an experienced DIYer. A full living room perimeter often stretches across one to two weekends. If your project involves new mains wiring or a dimmer switch upgrade, budget for a licensed electrician. Provincial electrical codes across Canada generally require licensed work on anything tied into house wiring, so treat that step as non-negotiable rather than optional.
Fixing Common Cove Lighting Problems
Flicker almost always traces back to a dimmer and driver that don’t share a protocol. Swap in a matched dimmable driver and the flicker usually disappears. Visible LED dots mean your strip density is too low or you skipped the diffuser. Scalloping, that wavy ceiling pattern, points to insufficient gap between the ledge and ceiling. Dark spots at corners usually mean gaps between strip runs that need a continuous splice.
For maintenance, check drivers annually, wipe diffusers to remove dust buildup, and watch for gradual color shift or dimming over years of use. Buy strips and drivers with accessible warranties so you can swap failed components without redoing the whole run.
Canada-Ready Cove Lighting Products and Where to Buy Them
For homeowners shopping in Canada, a few component categories cover nearly every cove lighting project: high-density 24V LED tape for long living room runs, opal-diffuser profile kits for a smooth finish, IP65 outdoor strips for eaves and patios, dimmable drivers matched to your dimmer protocol, and smart controllers for scheduling and color-temperature changes throughout the day.
Buying locally in Canada matters more than it seems. Shipping times shrink, returns are simpler, and local suppliers understand Canadian electrical standards and voltage compatibility. Montreal Lighting & Hardware carries designer fixtures like Crystorama’s Meridian ceiling mount to pair with your cove layer, along with outdoor options such as the Capsule outdoor ceiling mount for exterior eave applications.
Pro Tip: Match your driver’s rated wattage to your strip’s actual power draw per meter, then derate it by 20% for heat and long-run safety margin.
A quick note on priorities
When I think through a cove lighting project, three things matter more than anything else: concealing the strip well enough that only the glow shows, diffusing the light so it reads as one smooth line, and layering it with task and accent fixtures rather than asking it to do everything. Our team at Montreal Lighting & Hardware is happy to talk through your specific room and component choices.
Get the Right Parts and Support for Your Cove Lighting Project
Building a cove that actually looks professional comes down to sourcing the right driver, profile, and strip combination the first time, rather than reordering parts after a flicker or a dotty ceiling shows up. Montreal Lighting & Hardware stocks designer fixtures and hardware to pair with your cove layer, backed by a trade program for design professionals and fast Canadian shipping so your project doesn’t stall waiting on parts.

Whether you’re planning a bedroom headboard glow or a full living room perimeter, our showroom team can help you match components before you buy, not after something doesn’t work together. Browse fixtures like the Hulton ceiling mount to see how a cove layer pairs with a statement fixture, or visit the Montreal Lighting & Hardware homepage to explore current offers, including a warehouse sale with savings up to 50% off. Reach out to our team for project advice before you order your first meter of strip.
Sources
- Cove & Indirect Lighting: The Soft Glow Done Right (2026)
- Cove lighting with LED strips: exploring the benefits and techniques
