

Yes, you can convert a recessed can light to a pendant with a conversion kit, and it usually takes under an hour once the power is off. The one real caveat: your kit’s weight rating has to beat your pendant’s actual weight, and your existing wiring needs to look clean and undamaged. If either one fails that test, skip the kit and have an electrician install a proper fixture-rated box instead.
TL;DR:
- Most recessed cans suited for standard size (4-6 inches) can be converted using a kit support max weight under 15 pounds for safety.
- The conversion process involves disconnecting power, checking wiring health, installing a socket pigtail, fitting a brace, and attaching the pendant, typically in under an hour.
- Ensure your existing wiring is in good condition, and the can’s weight rating exceeds your pendant’s weight to prevent fire hazards or fixture failures.
- Heavy fixtures over roughly 15 to 20 pounds require replacing the can with a fixture-rated electrical box anchored to a ceiling joist.
- Use quality self-tapping screws, confirm canless LED compatibility, and verify the proper dimmer and bulb pairing to avoid flicker or buzzing issues.
Table of Contents
- What you need to convert a can light to a pendant
- How do you install a pendant conversion kit?
- Is your can light safe to convert?
- Fixing common installation problems
- What Montreal Lighting & Hardware recommends for this project
- DIY kit or full rework: which one fits your project?
- Get the right pendant and parts for your conversion
- Where this guide’s advice comes from
- Sources
- FAQ
What you need to convert a can light to a pendant
A recessed-to-pendant conversion kit is a small collection of parts designed to turn a can light into a hanging fixture without cutting drywall or running new wire. Every kit built for this job includes three core pieces: a socket pigtail with an E26 base (the same socket type as a standard lamp), a mounting bracket or channel brace that expands to grip the inside of the can, and a canopy or cover plate that hides the housing once the pendant is hung. Some kits also throw in a decorative medallion for a finished look against the ceiling.
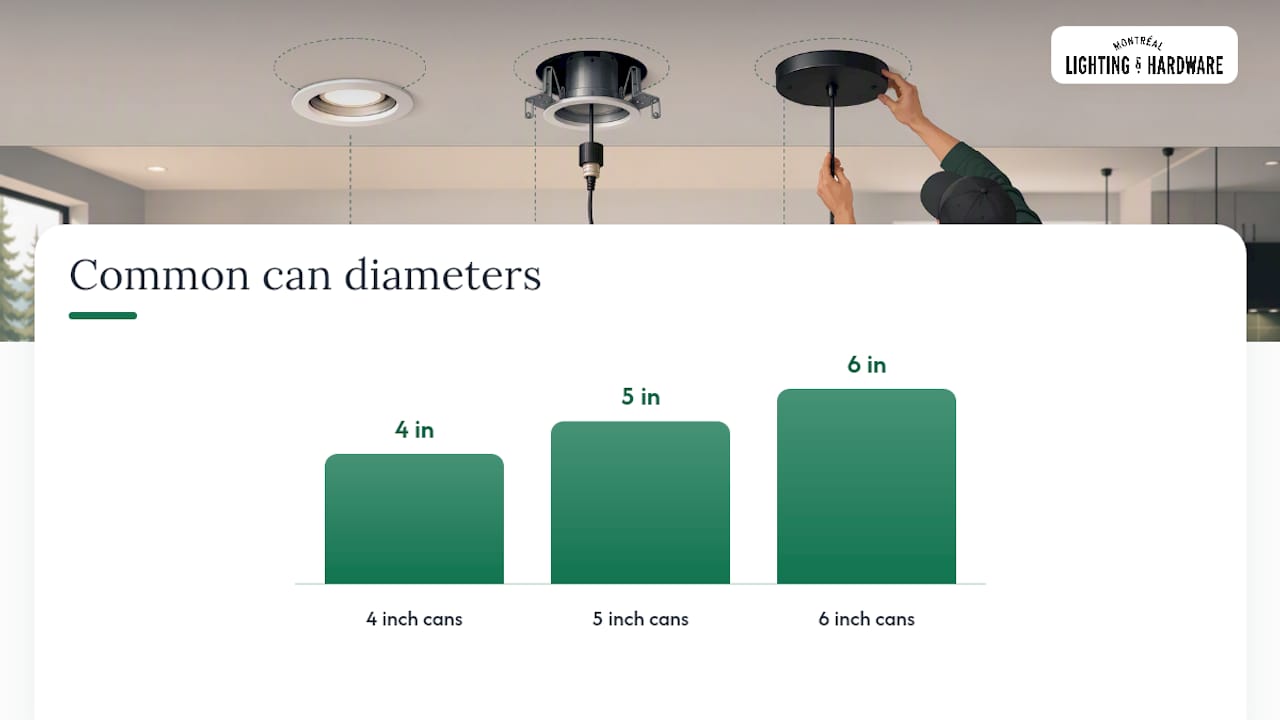
Fit matters more than price here. Most residential cans come in 4, 5, or 6 inch diameters, and kits are built around those sizes, so measure your housing before you order anything. Weight ratings vary by kit, often landing somewhere between 15 and 50 pounds, and that number is not a suggestion. A kit rated for a 10 pound fixture will not safely hold a 25 pound glass pendant no matter how tight you crank the brace screws.
Before you start, gather these extras:
- Quality self-tapping sheet-metal screws (the ones bundled with kits are often thin and strip out on older housings)
- A decorative medallion or cover plate sized to your ceiling
- Wire connectors (wire nuts) in the correct gauge for your fixture wire
- A non-contact voltage tester
- Wire strippers and a basic screwdriver set
Pro Tip: Buy a small stash of self-tapping screws in a slightly larger diameter than the kit’s stock hardware. Reviewers consistently run into stripped screws on older metal cans, and having a backup on hand saves a second trip to the hardware store.
One more thing worth checking before you buy: canless LED trim housings and some low-profile “wafer” style recessed lights don’t have the internal depth or socket configuration a standard kit expects. If your recessed light is one of these, a conversion kit likely won’t seat properly, and your better move is either a surface-mounted junction box adapter or a full housing swap.
How do you install a pendant conversion kit?
The process is mechanically simple, but the order matters, and skipping the safety checks is where most DIY jobs go wrong.
- Kill the power at the breaker. Not the wall switch, the breaker panel. Flip the correct breaker off and label it if your panel isn’t marked clearly.
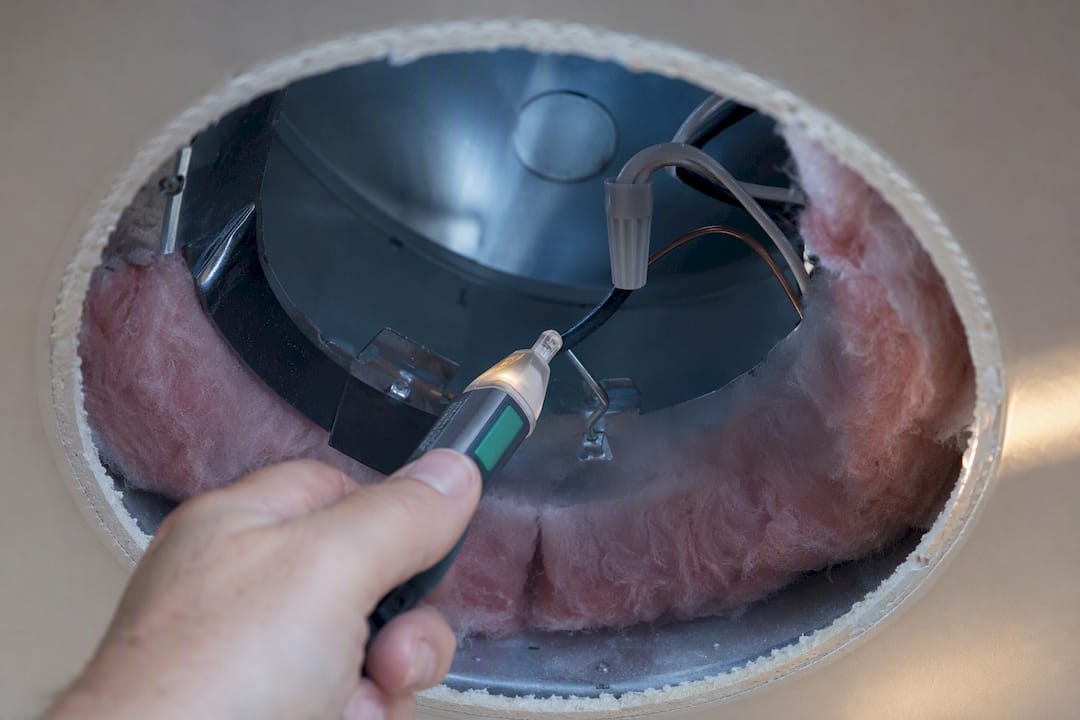
- Confirm the power is actually off. Touch a non-contact voltage tester to the wires inside the can before you touch anything with your hands. This step takes ten seconds and it’s the difference between a weekend project and a trip to the emergency room.
- Remove the bulb and trim. Pull the existing trim ring and bulb, then look inside the can for scorch marks, melted insulation, or loose wire nuts. If anything looks damaged, stop and call an electrician before proceeding.
- Install the socket pigtail. Connect the pigtail’s wires to the existing house wiring, matching black to black, white to white, and ground to ground. Twist on wire connectors and tug gently to confirm a solid connection.
- Fit the channel brace or mounting bracket into the can. Most kits use an expanding metal channel that presses against the inside walls of the housing. Secure it with the included screws, or your backup self-tapping screws if the originals don’t bite.
- Attach the mounting bracket for the pendant. This is the piece your pendant’s canopy will eventually screw into, so make sure it’s centred and tight before moving on.
- Wire the pendant itself. Connect the pendant’s black, white, and ground wires to the pigtail, tuck the excess wire up into the can, and slide the canopy or medallion flush against the ceiling.
- Restore power and test. Flip the breaker back on and check the fixture. If it’s on a dimmer, cycle it through its full range to check for flicker or buzzing.
- Check the level and final fit. Adjust the pendant’s drop length or swag if needed, and confirm the canopy sits flush with no visible gap.
Most people doing this for the first time budget an hour per fixture, and that estimate holds up well according to accounts from Pretty Handy Girl’s conversion walkthrough, provided the can is a standard size and the internal wiring is in good shape. Where that estimate falls apart is aged or damaged wiring: if you find brittle insulation or corroded connections inside the can, plan on more time, or better, plan on stopping and calling a licensed electrician instead of pushing forward.
DIY writeups tend to agree on one procedural point across the board: remove the trim, install the pigtail, fit the brace, then wire the pendant, always with the breaker off and a tester confirming dead wires first. A demonstration from Home Depot follows the same sequence: unscrew the bulb, adjust the cord to the length you want, thread in the conversion kit, and slide the canopy down to conceal the can. It’s a genuinely repeatable process once you’ve done it once.
If you’re hanging your pendant over an island or a dining table, don’t finish the job without checking your drop length against the surface below. A pendant hung at the wrong height throws off both the light spread and the room’s proportions, so it’s worth reviewing pendant height guidelines before you commit to a final wire length.
Is your can light safe to convert?
Not every recessed can is a good candidate for this project, and the checks below take five minutes but prevent the two failure modes that actually matter: fire risk and a fixture falling out of the ceiling.
IC vs non-IC housings. Look for a label inside the can itself. IC-rated housings are built to safely contact insulation; non-IC housings are not, and if insulation is packed against a non-IC can, adding a pendant that traps more heat or uses a higher-wattage bulb can create a real fire hazard. Modern LED bulbs run cooler than incandescents, which lowers the risk, but the housing label still governs what’s safe, according to safety guidance on conversion kits. If you can’t find a label or can’t confirm the rating, treat the can as non-IC and act conservatively.
Weight limits. Your kit’s stated rating is a hard ceiling, not a rough guide. Lightweight decorative pendants (glass globes, small metal shades, most fabric drum shades) sit comfortably within what a standard kit supports. Heavy glass fixtures, multi-light chandeliers, or anything over roughly 15 to 20 pounds usually calls for a different approach entirely: removing the can and installing a fixture-rated electrical box anchored directly to a ceiling joist, which is not a job a recessed housing was ever designed to handle.
Wiring condition red flags. Stop and call a licensed electrician if you see any of the following:
- Scorch marks or discoloration around the socket or wire nuts
- Brittle, cracked, or crumbling wire insulation
- A breaker that trips repeatedly on that circuit
- Flickering that started before you touched anything
Dimmer and bulb compatibility. Pair your pendant’s bulb type with a dimmer rated for it. LED bulbs need LED-compatible dimmers; pairing an LED bulb with an older incandescent dimmer is one of the most common causes of buzzing and flicker after a swap.
Pro Tip: Keep the breaker off and the voltage tester in hand for every step that touches bare wire, even the “quick” ones. Most electrical shocks during DIY projects happen during the steps people assume are already safe.
Fixing common installation problems
Screws won’t bite into the can. This is the single most reported frustration in DIY writeups, and the fix is straightforward: swap the kit’s included screws for higher-quality self-tapping sheet-metal screws with a sharper point and coarser thread.
Canopy won’t sit flush. Check that the mounting bracket is centred and that insulation or debris isn’t wedged between the canopy and the ceiling surface. A slightly oversized medallion can also hide a small gap if the canopy itself won’t seat perfectly.
Flickering or dimming issues. Confirm your bulb and dimmer are actually rated for each other. LED flicker on incompatible dimmers is a well-documented issue, and inspection reports on wiring problems note it as one of the most common callouts electricians see after fixture swaps. Swapping to an LED-rated dimmer usually solves it; if it doesn’t, the issue may be upstream in the wiring itself.
Wobbly or loose fixture. Recheck that the channel brace is fully expanded and tight against the can’s interior walls. If it still wobbles after retightening, that’s a sign the kit isn’t a secure match for this housing, and it’s time to consider a fixture-rated ceiling box instead.
What Montreal Lighting & Hardware recommends for this project
Pendant conversions are a common project, and several practical patterns hold up project after project. Standard 4 to 6 inch cans pair well with most decorative pendants under 15 pounds; anything heavier deserves a second look at the housing before you commit.
- Choose #8 self-tapping sheet-metal screws over the thinner stock hardware for a more secure brace fit on older cans
- Size your medallion slightly larger than the visible gap around the canopy for a cleaner finish
- Stay well under your kit’s stated weight rating, not right at the edge of it, since ratings assume ideal conditions
- Browse our ceiling lighting selection for pendants sized and specified for exactly this kind of swap
For anything heavier or where the wiring looks questionable, professional contractors and showroom staff can help measure canopy clearance and match a fixture to your ceiling before purchase, but a licensed electrician should handle the actual structural or wiring work.
DIY kit or full rework: which one fits your project?
Conversion kits are the right call for lightweight, decorative pendants and renter-friendly upgrades where you want a real style change without opening the ceiling. They work because the physics are forgiving: a small brace inside a sound can housing, holding a fixture well under the rated weight, is a stable and safe setup.
A full rework, meaning a new fixture-rated box anchored to a joist, becomes the right call once you’re dealing with a heavy glass pendant, aging or damaged wiring, or a housing you can’t confidently identify as IC-rated. Skipping that step to save an afternoon is the trade-off that actually costs you. When in doubt, get an inspection before you get a ladder.
— Montreal Lighting & Hardware
Get the right pendant and parts for your conversion
Pendant styles built to work well with standard conversion setups include options from compact single-light drops to sculptural statement pieces.

If you’ve read through the steps above and want a pendant that matches your ceiling height, canopy size, and the mood of the room, browse our ceiling lighting collection for options across sizes and finishes, including LED pendants like the Liquid LED Pendant from Sonneman, which pairs a clean canopy profile with a manageable weight for standard kits. Showroom teams can help match canopy dimensions and medallion sizing before ordering, and trade programs often support designers and contractors sourcing multiple fixtures for a single project. Available products include pendants, canopies, and medallions for a clean finish. For heavy fixtures or any structural ceiling work, our honest recommendation is to bring in a licensed electrician rather than push a kit past its limits. Review lighting collections to find a pendant that fits your space.
Where this guide’s advice comes from
The step-by-step method and kit contents draw on hands-on conversion walkthroughs from Pretty Handy Girl and Afro and Reno. Safety and compatibility guidance comes from EatHealthy365’s conversion kit safety explainer, while structural and wiring thresholds for switching to a fixture-rated box come from Bolt Blitz Electric’s contractor guidance.
Sources
- 5 Minute light upgrade – Converting recessed to pendant (Pretty Handy Girl)
- How to convert a recessed light to a pendant (Afro and Reno)
- Is a recessed light conversion kit safe to use? (EatHealthy365)
- Converting can lights to pendant lights — contractor guidance (Bolt Blitz Electric)
- How I replaced my can lights with pendants (LutzGoHome)
FAQ
Can I change a can light to a pendant light?
Yes, most standard 4 to 6 inch recessed cans can be converted using a conversion kit with a socket pigtail, brace, and canopy. The main condition is that your pendant’s weight stays under the kit’s rating and the existing wiring is in good condition.
Can I convert a recessed light to a light fixture?
Yes. A recessed can light is technically already a light fixture, but swapping it for a pendant, flush mount, or other hanging style is a common upgrade using the same conversion kit approach. If the new fixture is heavy, the recommended path is replacing the can with a fixture-rated electrical box instead.
How do I change a regular light to a pendant light?
The process is the same as a can-to-pendant conversion: cut power at the breaker, verify with a voltage tester, connect a socket pigtail to the existing wiring, secure a mounting bracket, then wire and hang the pendant. Most installs take under an hour once the power is confirmed off and the wiring checks out.
What can you replace can lights with?
Beyond pendants, recessed cans can be swapped for flush mounts, semi-flush fixtures, or small chandeliers, depending on the housing’s weight rating and IC certification. Montreal Lighting & Hardware’s ceiling lighting selection includes several styles sized for direct conversion.
Do I need an electrician to convert a can light to a pendant?
Not for a standard, lightweight conversion using a rated kit on sound wiring; that’s a manageable DIY project for most homeowners. You do need an electrician if the wiring shows damage, the can isn’t IC-rated for your setup, or your pendant exceeds the kit’s weight rating.
