

Japandi lighting means warm, layered, material-forward light: sources between 2,700 and 3,000 K, a high colour-rendering index for wood and textiles, and at least two or three light layers per room instead of one bright overhead fixture. Get those three things right, and the calm, tactile look follows almost on its own. The checklist, room examples, and common mistakes below walk you through exactly how.
TL;DR:
- Choose fixtures with a color temperature of 2,700 to 3,000 K for warmth, avoiding anything closer to 4,000 K that can look clinical.
- Ensure high CRI (80-90) bulbs to accurately render wood grain, ceramics, and textiles, which are central to the material honesty in Japandi design.
- Layer lighting with at least three functions—ambient, task, and accent—using appropriate fixtures to create depth and avoid reliance on a single overhead light.
- Measure ceiling height and furniture dimensions carefully before selecting fixtures, and verify lumens, CCT, and dimmer compatibility to prevent mismatched or nonfunctional setups.
- Avoid installing delicate paper or washi shades in humid or greasy areas, as they are prone to damage and require proper maintenance.
Table of Contents
- What is Japandi lighting, and why does it look different?
- Getting the technical details right: CCT, CRI, layering, and scale
- Your practical checklist before you buy a Japandi fixture
- Bringing Japandi lighting into each room
- The mistakes that quietly ruin a Japandi room
- Montreal Lighting & Hardware’s take on Japandi fixtures
- Shop Japandi-friendly fixtures at Montreal Lighting & Hardware
- Sources
- FAQ
What is Japandi lighting, and why does it look different?
Japandi lighting comes from a design marriage: Japanese minimalism, with its respect for material honesty and negative space, and Scandinavian hygge, which values warmth and comfort above showiness. Neither tradition prizes a dramatic chandelier as a room’s centrepiece. Both prize restraint, so lighting in a Japandi room tends to work quietly in the background, shaping mood rather than demanding attention.
That shared philosophy shows up in three lighting habits worth understanding before you shop. Good Housekeeping’s breakdown of the style describes Japandi as tranquility paired with function, and that pairing dictates how a fixture earns its place in the room.
- Simplicity over ornament: a fixture’s silhouette should feel calm, not sculptural for its own sake.
- Material honesty: wood grain, ceramic glaze, and paper texture should read clearly under the light, not be flattened by it.
- Proportion first: a fixture is sized to the room and the furniture beneath it, not chosen for maximum visual impact.
Designers working across both traditions describe this as light that reveals a material rather than competing with it, a point echoed in Claesson Koivisto Rune’s work in Japan. A rice-paper pendant over a walnut dining table, or a ceramic table lamp beside a linen sofa, only works if the light source itself is warm enough to do the material justice.
Getting the technical details right: CCT, CRI, layering, and scale
The look lives or dies on a handful of numbers, and none of them require an electrician’s licence to understand.
Colour temperature (CCT) is the single biggest lever. Natural Resources Canada’s lighting guide recommends 2,700 to 3,000 K bulbs for a warm, inviting atmosphere in living spaces, and that range is exactly where Japandi wants to sit. Anything closer to 4,000 K starts to read clinical against warm wood tones and washi shades.
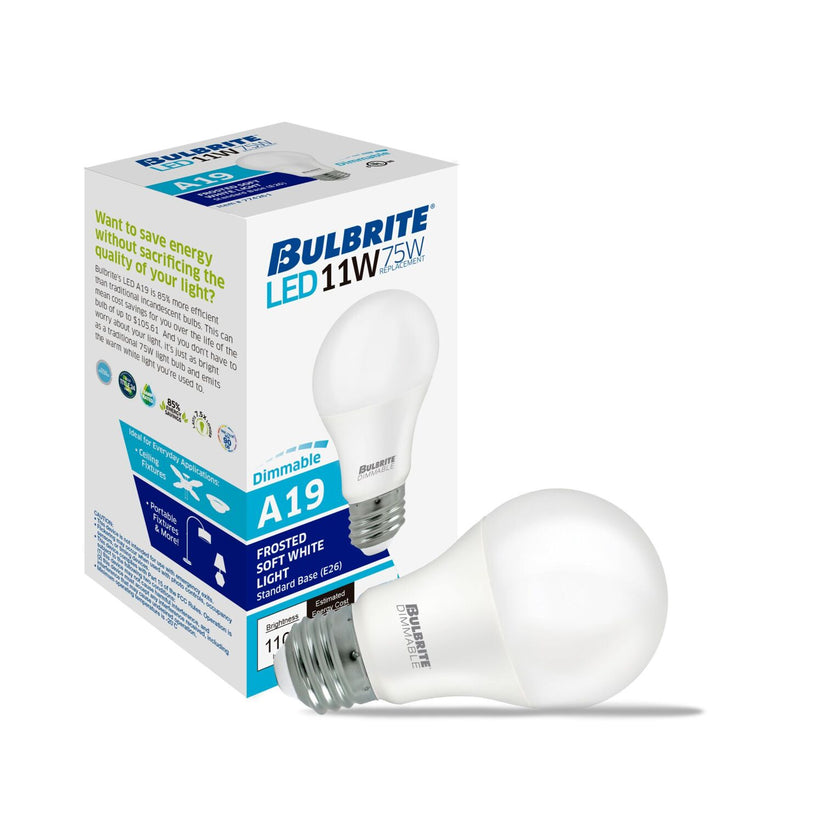
Colour rendering (CRI) matters just as much, even though it gets less attention than CCT. A bulb with a high CRI shows wood grain, ceramic glaze, and fabric texture accurately; a low-CRI bulb can wash out the exact materials Japandi depends on. Aim for CRI 80 to 90 or higher wherever material colour is the point of the room.
Layering is the structural habit that separates Japandi interiors from a single flush-mount ceiling light. NRCan’s guidance breaks lighting into four functions: ambient (overall room fill, often a ceiling fixture or recessed cans), task (reading or prep light, like a floor lamp or under-cabinet strip), accent (highlighting a material or object), and decorative (a fixture that is itself part of the room’s character, like a sculptural pendant). A Japandi room usually needs at least three of the four working together.
Scale and diffusion finish the picture. A pendant over a dining table should typically span roughly a third to half the table’s width, hung low enough for intimacy without blocking sightlines. Frosted glass and washi paper diffuse light beautifully and soften shadows, but paper shades are vulnerable to humidity, grease, and prolonged direct sun, so material-suitability guidance recommends reserving them for protected, low-moisture rooms.
Pro Tip: Hold a swatch of your actual wood floor or table finish under a bulb before buying it. A 3,000 K bulb over pale oak reads warm and honest; the same bulb over dark walnut can occasionally look muddy, so test the pairing rather than trusting the packaging alone.
Your practical checklist before you buy a Japandi fixture
Run through these steps in order, and you’ll avoid the two most common return reasons: wrong size and wrong colour temperature.
- Measure first. Record ceiling height, table dimensions, and the distance from the fixture location to nearby seating before you open a single product page.
- Check lumens, not watts. A fixture’s brightness is measured in lumens; watts only tell you energy draw. NRCan’s lighting reference guide lists lumens, CCT, efficiency, and rated life as the attributes worth comparing across bulbs.
- Confirm CCT and CRI on the spec sheet. Look for 2,700 to 3,000 K and CRI 80 or higher; if the listing doesn’t state CRI, ask before you buy.
- Verify dimmer compatibility. Integrated LED fixtures need a driver that matches your dimmer switch, not a generic incandescent dimmer.
- Check material care limits. Unglazed ceramic and washi shades have real maintenance boundaries; confirm cleaning instructions match where you plan to install the piece.
- Look for safety markings and installation requirements. Any hardwired fixture, especially recessed IC or ICAT-rated cans, should be installed by a qualified electrician.
- Favour ENERGY STAR-qualified fixtures where available. Lighting accounts for roughly 10% of household electricity use, and ENERGY STAR bulbs deliver meaningful savings over standard LEDs across their lifespan.
A lighting schedule, even a simple one listing fixture, wattage equivalent, and CCT per room, keeps larger projects from turning into a pile of mismatched receipts. If you’re planning several rooms at once, a lighting schedule guide is worth building before you start ordering.
Bringing Japandi lighting into each room
The layering principle plays out differently depending on what a room is actually used for.
- Living room: pair an ambient source, either a ceiling fixture or recessed cans, with a warm floor lamp beside the seating and one accent light aimed at a wood shelf or textured wall. Ambient light in a mid-size living room typically sits in the range of 1,500 to 3,000 lumens total, split across fixtures rather than concentrated in one.
- Dining room: a single pendant or a pair of smaller pendants, hung low with a diffusing shade, does the heavy lifting. Match the fixture’s width to roughly a third to half the table’s length, and put it on a dimmer so the room can shift from bright meal prep to a softer dinner mood.
- Bedroom: keep ambient light gentle and put the real function into bedside task lamps. Warm CCT and a good CRI matter here more than in almost any other room, since bedding, linen, and skin tone all read poorly under cool or low-CRI light.
- Entry and small spaces: a sculptural wall sconce or a single striking pendant introduces warmth the moment someone walks in, without the glare a bright overhead fixture can create in a tight hallway.
The mistakes that quietly ruin a Japandi room
A handful of habits show up again and again, and every one of them is an easy fix once you know to look for it.
- Relying on a single overhead fixture. One ceiling light almost always reads flat and institutional; layering with a floor or table lamp fixes it instantly.
- Using leftover cool-white bulbs. A 5,000 K bulb in a warm oak room fights the material instead of complementing it. Swap to 2,700 to 3,000 K.
- Installing paper or washi shades in humid or greasy spots. Kitchens near the stove and bathrooms without strong ventilation will shorten a delicate shade’s life fast.
- Ignoring dimmer compatibility. An integrated LED fixture on the wrong dimmer type can flicker or buzz, and a mismatched CRI will wash out exactly the wood and ceramic tones you chose the fixture to show off.
Montreal Lighting & Hardware’s take on Japandi fixtures
We look for fixtures where the material does the talking: solid wood, real ceramic, metal with an honest finish, paired with integrated LED specs that hold a warm CCT and dim cleanly. Durability matters as much as looks; design coverage of the Japandi trend makes the same case against disposable “natural-looking” fixtures that fade or chip within a season. Our showroom and trade programme exist so designers and homeowners can handle finishes in person before committing. One tip that saves the most regret: bring your table or ceiling measurements with you, because scale, not style, is where most Japandi purchases go wrong.
— Montreal Lighting & Hardware
Shop Japandi-friendly fixtures at Montreal Lighting & Hardware
Montreal Lighting & Hardware carries the categories a Japandi room actually needs in one place: ceiling lighting, wall sconces, and table and floor lamps that lean into warm tones and honest materials rather than trend-chasing gimmicks. A piece like the Liquid LED Pendant shows how an integrated LED fixture can still deliver the soft, diffused glow the style calls for, with the dimmable control this article recommends checking before purchase.

If you’re outfitting a full room, browse the full lighting collection to compare pendants, sconces, and lamps side by side, or reach out to the trade team for guidance on scale, CCT, and dimmer compatibility before you order. Homeowners and design professionals benefit from tailored solutions and prompt shipping, helping avoid the uncertainty of choosing a fixture that may be difficult to return once installed.
Sources
Natural Resources Canada’s Home Lighting Design Guide Pocket Book and its companion Lighting Reference Guide cover the technical side: lumens, CCT, CRI, and installation ratings. For the design context behind the aesthetic, Good Housekeeping’s Japandi explainer and the Los Angeles Times’ coverage of the trend are both worth a read. For a multi-room renovation or a heritage property with tricky wiring, a professional lighting designer is worth consulting before you commit to a full fixture plan.
- Home Lighting Design Guide Pocket Book - Natural Resources Canada
- LIGHTING Reference Guide - Natural Resources Canada
- What Is Japandi Style? — Good Housekeeping
- Japandi interior design trend coverage — Los Angeles Times
FAQ
What is Japandi style lighting?
Japandi style lighting blends Japanese minimalism with Scandinavian warmth, favouring layered, low-glare light sources between 2,700 and 3,000 K over a single bright overhead fixture. Fixtures typically use natural materials like wood, ceramic, and paper to keep the look tactile rather than showy.
What are common Japandi decor mistakes?
The biggest mistake is relying on one ceiling fixture instead of layering ambient, task, and accent light. Close behind that: using cool-white bulbs on warm wood tones, oversizing a pendant for its table, and installing delicate washi shades in humid or grease-prone spots.
Are wabi-sabi and Japandi the same?
They’re related but distinct. Wabi-sabi is a Japanese philosophy centred on imperfection and impermanence, while Japandi is a broader interior style that borrows wabi-sabi’s material honesty and blends it with Scandinavian comfort and function.
Is Japandi style still trending in 2026?
Yes, and trend coverage suggests it’s leaning even warmer and more tactile, with richer woods, organic stone, and handmade details replacing some of the earlier, starker minimalism. Fixtures with real material texture, rather than disposable natural-look finishes, are what’s driving that shift.
