

Layer your ambient, accent, and task lighting; specify CRI 90+ for accent fixtures and CRI 95+ for jewelry, cosmetics, and produce displays; and choose dimmable LED fixtures with flexible mounting so you can adjust as merchandising changes. Get those three decisions right before anything else, and most other design choices fall into place around them.
TL;DR:
- Prioritize layering ambient, accent, and task lighting, with CRI 90+ for accents and 95+ for jewelry and cosmetics, and choose dimmable fixtures upfront.
- Set clear targets for store type, zones, CCT, CRI, lux levels, and adjustable fixtures before starting design or ordering fixtures.
- Use contrast ratios of 3:1 to 5:1 for general merchandise and higher, up to 10:1, for luxury items, ensuring lighting emphasizes perceived product value.
- Select fixtures with appropriate beam angles and mounting heights based on function, avoiding spill and glare issues in key display areas.
- Incorporate adjustable, dimmable controls like DALI or 0-10V, and verify vendor warranties and spectral data to ensure long-term performance and color fidelity.
Table of Contents
- What Should Be On Your Retail Store Lighting Design Checklist?
- The Three Layers of Retail Lighting and Concrete Targets
- Color Accuracy and Mood: Picking CCT, CRI, TM-30, and R9
- Fixture Types, Beam Angles, and Placement Rules
- Controls and Energy: Dimming, Sensors, and Canadian Rebates
- Layout and Zoning: Windows, Displays, Aisles, and Checkout
- From Plan to Install: Implementation Checklist and Supplier Questions
- Montreal Lighting & Hardware: Trade Support for Canadian Retail Projects
- Maintenance and Durability Considerations for Retail Lighting
- Integrating Lighting Design With Branding and Merchandising
- Budget Planning and Cost Implications for Retail Lighting Projects
- Why Specification Beats Inspiration in Retail Lighting
- Get Retail-Ready Fixtures Through Montreal Lighting & Hardware’s Trade Program
- Sources
What Should Be On Your Retail Store Lighting Design Checklist?
Before you call a supplier or brief a contractor, decide these five things on paper. Retail store lighting design goes sideways most often not because someone picked the wrong fixture, but because nobody agreed on the targets before fixtures got ordered.
Start with your store type and merchandising goals. A jewelry counter, a grocery aisle, and a boutique fitting room are not solved by the same light. Once you know what each zone needs to accomplish, you can set baselines for color temperature (CCT) and color rendering (CRI), then attach lux targets to the zones that matter most, like feature walls, cash wrap, and window displays.
Here is what to lock down before design work starts:
- Store type and merchandising goals: Define what each zone is selling and what mood supports it.
- CCT and CRI baselines: Pick a warm/neutral/cool range and a minimum CRI for accent and display lighting.
- Lux targets per zone: Set numbers for entrance, aisles, feature displays, and checkout, not just an overall average.
- Dimming and adjustable fixtures: Require track heads or adjustable recessed fixtures wherever merchandising changes seasonally.
- Controls budget: Set aside money for dimmers, sensors, or a basic control system, not just lamps and fixtures.
- Photometric survey: Ask your supplier or electrician for a lighting layout showing calculated lux levels, not a guess.
- Mockup budget: Fund a small in-store test of two or three fixture options before a full rollout.
- Maintenance plan: Decide who replaces lamps and drivers, and how often, before installation day.
- Warranty terms: Confirm driver and LED warranty lengths in writing, especially for 24/7 operating hours.
- Trade pricing inquiry: Ask about trade program pricing if you are a designer, contractor, or repeat buyer.
Pro Tip: Bring a printed floor plan and three reference photos of displays you admire to your first supplier conversation. Suppliers can quote lux targets and fixture counts far faster when they can see your layout instead of guessing from a verbal description.
The Three Layers of Retail Lighting and Concrete Targets
Every well-lit store runs on three layers working together: ambient, accent, and task. Ambient lighting fills the space with general illumination so people can move around safely and see merchandise at a baseline level. Accent lighting highlights specific products or displays, usually at two to five times the ambient level, to draw the eye and create a sense of value. Task lighting handles functional zones, checkout counters, fitting rooms, and stockrooms, where staff and customers need clear, even light to do something specific.
The ConTech retail lighting guide treats contrast, not raw brightness, as the real driver of perceived product value. A well-planned accent-to-ambient ratio makes merchandise look more expensive without raising your energy bill. Cranking up every fixture in the store to make things “brighter” tends to flatten that contrast and actually make displays look cheaper.
IES RP-2-20 sets the illuminance and uniformity benchmarks most Canadian lighting designers work from. Contrast ratios between accent and ambient typically run 3:1 to 5:1 for general merchandise, climbing well past 10:1 for jewelry and small luxury items where drama sells.
These targets align closely with the CIBSE Lighting Guide 17 for retail premises, which distinguishes outlet types by task and merchandise value rather than applying a single blanket lux figure to the whole store. Notice how convenience stores and supermarkets run flatter contrast ratios than boutiques and jewelry counters. That is not an accident; grocery and convenience formats need customers to see prices and shelf stock quickly, while boutiques and jewelry cases use contrast to slow shoppers down and hold their attention on one item.
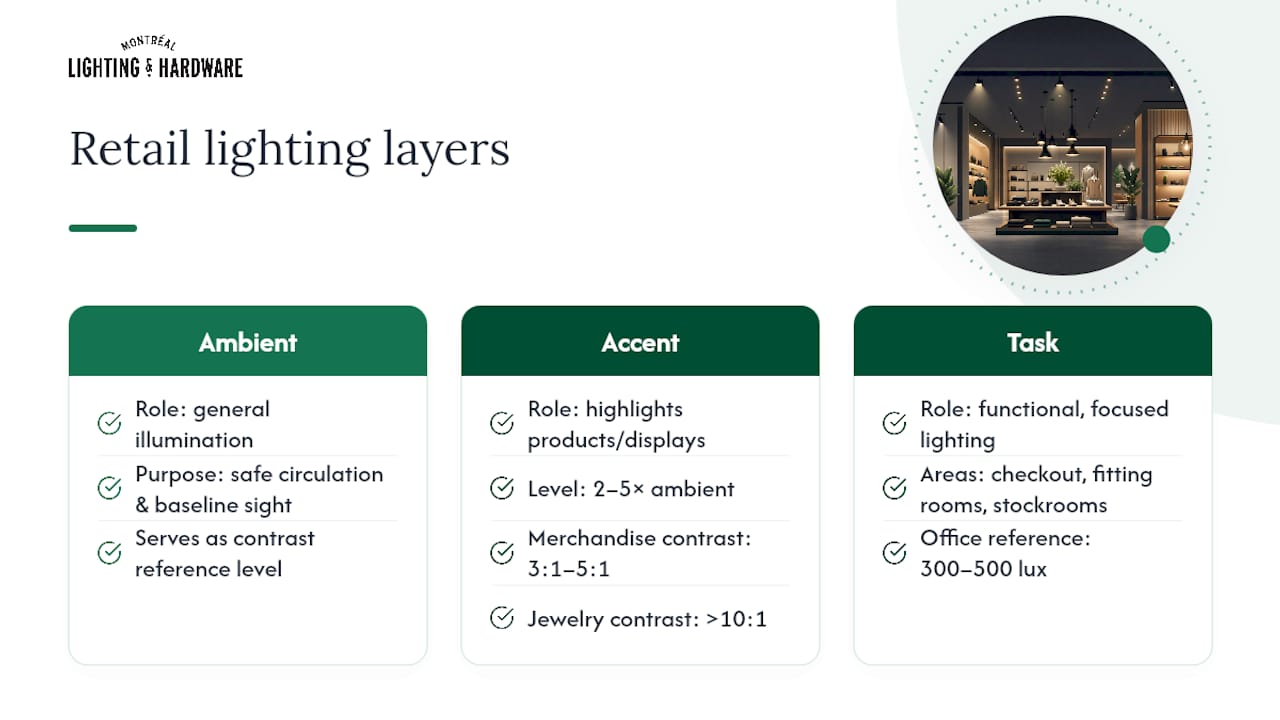
If you manage a mixed-use commercial space with office areas attached to retail, note that office lighting standards in Canada generally call for 300 to 500 lux at desk height, a helpful reference point when you are lighting a back-office or consultation area within a larger retail footprint.
Color Accuracy and Mood: Picking CCT, CRI, TM-30, and R9
Color temperature sets the mood; color rendering determines whether your merchandise actually looks the way it does in daylight. Get both wrong and even a perfectly bright store can look off. Warm CCT in the 2700K to 3000K range suits fashion, home goods, and anything meant to feel inviting, cozy, or premium. Neutral CCT in the 3000K to 3500K range works well for general apparel and mixed-category stores where you want warmth without leaning too amber. Cooler CCT at 4000K and above suits electronics, hardware, and technical goods, where clarity and precision matter more than coziness.
Multi-category retailers do not have to pick one CCT and live with it. Tunable white fixtures let a single store shift from warm tones in a homewares section to cooler light near electronics, or adjust seasonally as merchandise rotates, without rewiring anything. That flexibility matters more than most owners expect once they have run a store through a full year of seasonal resets.
CRI (color rendering index) matters just as much as CCT, and it is the spec most retailers skip. A CRI of 90 or higher for accent lighting is the working minimum most trade guides recommend. Push to CRI 95, or ask for TM-30 spectral data, for jewelry, cosmetics, and produce, where color fidelity directly affects whether a customer trusts what they are looking at. R9, a specific measure of red rendering within TM-30 data, deserves attention too: a lamp can post a high general CRI while still rendering reds and skin tones poorly if its R9 value is weak. That gap shows up fast on red produce, cosmetics, and warm-toned apparel.
Vendor and trade sources report that CRI 90+ fixtures paired with the right beam angle can improve perceived product quality and reduce returns in apparel and homeware, where customers often buy based on how a color looks in the store versus how it looks at home.
Before you commit to a fixture order, run a few quick checks:
- Sample swatches under the actual fixture, not under showroom lighting or a spec sheet number.
- In-situ mockups of at least one full display, viewed at the times of day your store gets the most traffic.
- Request spectral power distribution data from the manufacturer, especially for jewelry and cosmetics cases, so you can verify R9 and TM-30 values instead of trusting a CRI number alone.
Fixture Types, Beam Angles, and Placement Rules
Fixture choice follows function, and beam angle is where most retail lighting plans quietly fall apart. A fixture with the right lumen output but the wrong beam angle either floods the aisle with unwanted spill or leaves a display looking like a spotlight missed its mark.
Track heads remain the workhorse for accent lighting because they let you re-aim as merchandise moves, which matters enormously for stores that reset displays monthly or seasonally. Linear fixtures, whether recessed, suspended, or surface-mounted, handle general aisle and shelving ambient light efficiently and with minimal visual clutter. Recessed downlights and flat panels fill the same ambient role in spaces where a cleaner ceiling line matters more than adjustability. Mini spotlights, often narrow-beam LED units, do the heavy lifting for jewelry cases and small luxury items. Pendants carry the store’s identity, marking the entrance, the cash wrap, or a signature display table with a decorative element that does double duty as a wayfinding cue.
Beam angle guidance breaks down roughly like this:
- 8° to 15°: jewelry cases and small luxury items, where tight control avoids glare on glass and metal.
- 24° to 36°: apparel and general merchandise displays, wide enough to cover a rack without excessive spill.
- 40° to 60°: shelving and general ambient fill, where even coverage across a wider area matters more than punch.
Narrower beams create dramatic pools of light and sharper contrast, which is exactly what a jewelry counter wants and exactly what a wide apparel wall does not. Wider beams spread light more evenly but sacrifice the punch that makes a single product feel special. Get the pitch wrong in either direction and you either blind shoppers standing near a case or wash out a feature display until it blends into the wall behind it.
Mounting height and aim matter as much as the fixture itself. Pendants over a cash wrap or feature table typically hang 8 to 12 feet above finished floor for general ambient pendants, with decorative fixtures over counters often dropping to 36 to 48 inches above the counter surface, a placement rule ConTech’s retail guide uses consistently across its layout examples. Track heads aimed at glossy displays or glass cases need careful angling, usually 30 degrees or steeper off vertical, to avoid throwing glare straight back at a shopper’s eyes. The same caution applies near point-of-sale screens and mirrors, where a poorly aimed accent fixture can wash out a display or create a distracting reflection right where staff are trying to close a sale.
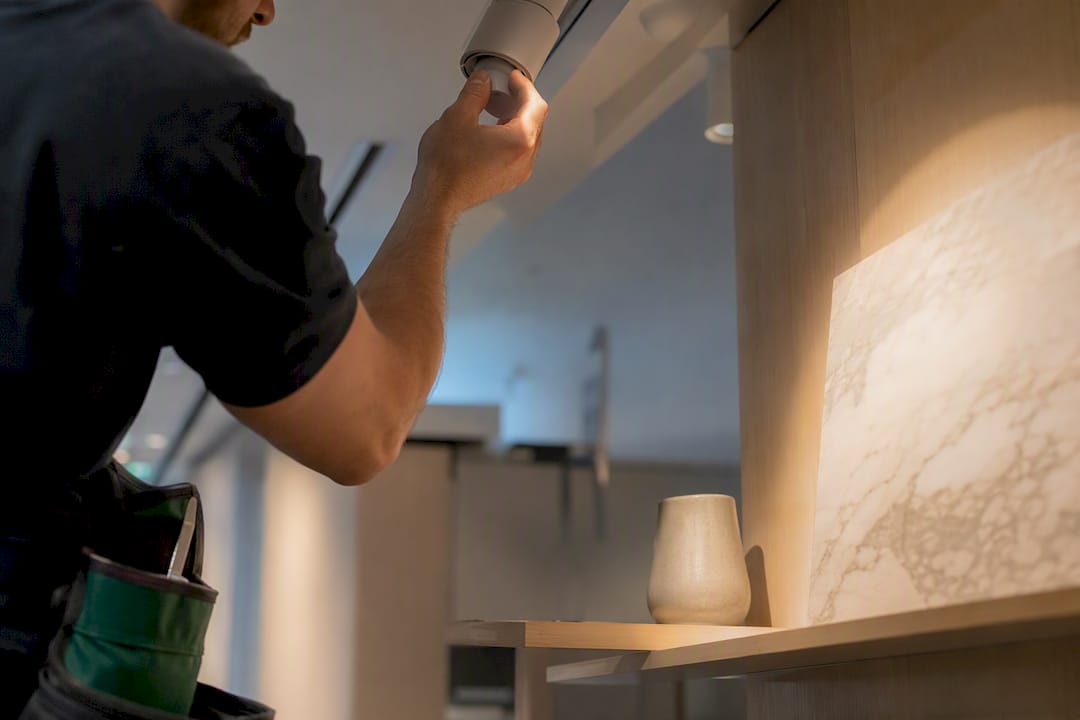
If you are retrofitting an existing space rather than building from scratch, modular fixture plans designed for retrofit wiring can save you from an expensive rewiring project while still giving you the adjustability a good accent layer needs.
Controls and Energy: Dimming, Sensors, and Canadian Rebates
Your control system decides whether your lighting plan actually survives contact with a real, changing store. A fixture with a great beam angle and perfect CRI is only as good as your ability to dim it, schedule it, or shift its color temperature as merchandising evolves.
Three control protocols dominate retail installs. DALI (Digital Addressable Lighting Interface) offers the most granular, individually addressable control and suits larger stores or chains that want centralized management across multiple zones. 0 to 10V dimming is simpler and cheaper, a reasonable fit for single-location stores with straightforward dimming needs. Wireless control systems have closed much of the gap on reliability and now suit retrofit projects where running new low-voltage wiring is impractical. Whichever protocol you choose, confirm dimmer and driver compatibility before ordering. Mismatched dimmers and LED drivers are the single most common cause of flicker, humming, or a dead dimming range in retail installs.
Occupancy and daylight sensors pay for themselves fastest in stockrooms, fitting rooms, and back-of-house areas where lights often run all day regardless of whether anyone is in the room. Tunable white systems add a different kind of value: the ability to shift a whole zone’s color temperature for a seasonal reset without touching a single fixture. Smart, modular lighting systems now go further still, layering operational data like shelf-empty alerts and foot-traffic patterns on top of standard lighting control, turning your ceiling into a source of store insight rather than just illumination.
For grocery and supermarket formats specifically, ENERGY STAR’s guidance for supermarkets and grocery stores outlines concrete energy-savings opportunities worth reviewing before you finalize a lighting plan. Canadian retailers should also check with their provincial utility, since rebate programs for LED retrofits and controls vary significantly by province and change from year to year.
A five-minute test avoids a callback three weeks after installation when the whole run starts to flicker.*
Layout and Zoning: Windows, Displays, Aisles, and Checkout
A good lighting layout treats the store as a sequence of moments, not one uniform space. Here is how to zone it, in the order a customer actually experiences it:
- Windows and entrance. Window displays typically call for higher contrast and slightly warmer color temperatures than the general floor, since a window’s job is to stop someone on the sidewalk. Build a transition zone just inside the entrance so shoppers’ eyes adjust gradually from outdoor light to interior levels rather than walking into a jarring change.
- Aisles and shelving. Continuous linear fixtures or evenly spaced downlights keep shelf lighting consistent from end to end. Vertical illuminance, the light actually hitting the face of the shelf rather than the floor in front of it, matters more here than horizontal floor lux, since that is what customers see as they scan products at eye level.
- Feature displays and hero tables. These get the highest accent lux in the store, following the contrast ratios covered earlier, and benefit from adjustable track heads so the display can be re-aimed as merchandise rotates.
- Fitting rooms. High CRI matters intensely here, arguably more than anywhere else in the store, because shoppers are evaluating skin tone and fabric color while deciding whether to buy. Vertical lighting, positioned to illuminate a person standing in front of a mirror rather than lighting the floor, avoids the harsh shadows that make people put clothing back on the rack.
- Checkout and point of sale. Task lighting here should sit in a moderate range, generally higher than general ambient but well below accent display levels, enough for staff to read labels, count change, and process transactions without glare bouncing off a POS screen.
Each zone earns its own lux target and fixture choice, which is exactly the layered approach IES RP-2-20 recommends rather than a single blanket illuminance figure applied to the whole floor plate.
From Plan to Install: Implementation Checklist and Supplier Questions
Getting from a lighting plan to a working installation runs cleaner when you follow a set order and ask suppliers the right questions upfront.
- Measure before you design. Take photometric measurements of the existing space if you are retrofitting, and note surface reflectances, wall color, flooring, ceiling finish, since dark surfaces absorb far more light than a lighting plan calculated for a blank white box.
- Build a mockup. Test two or three fixture options on a single display or aisle section before ordering for the whole store. A mockup catches CCT mismatches and glare problems that a spec sheet never reveals.
- Request a photometric report. A proper report shows calculated lux levels across your floor plan, not just a fixture count and wattage total.
- Lock your specification sheet. Confirm lumens, beam angle, CRI or TM-30 data, dimmer compatibility, driver warranty length, and IP rating for any fixture near moisture or outdoor entrances before placing an order.
- Validate on-site. Once fixtures go in, aim, measure, and adjust. Expect at least one round of fine-tuning after the electrician leaves, especially on track heads and adjustable accents.
- Schedule maintenance. Set a lamp and driver replacement schedule in writing, and request documentation, photometric reports, warranty terms, and as-built drawings, for future reference.
Ask your vendor these questions before you sign off: What is the guaranteed CRI and R9 value, not just the advertised CRI? What is the beam angle at full output versus dimmed? What is the driver warranty, and does it cover labor or parts only? Is the fixture rated for the ambient temperature of an enclosed display case? A supplier who answers these clearly, with spec sheets rather than a shrug, is one worth ordering from again.
Pro Tip: Request the manufacturer’s IES photometric file, not just a cut sheet, for any fixture going into a feature display. Most commercial lighting design software can import that file and show you exactly how the light will fall on your specific display before a single fixture ships.
Montreal Lighting & Hardware: Trade Support for Canadian Retail Projects
Montreal Lighting & Hardware runs a trade program built for exactly the kind of specification work this guide covers: designers, contractors, and retail owners who need the right fixture, at the right price, without guesswork. Trade clients get access to exclusive pricing and spec support drawn from a catalog that includes designer brands like Savoy House and Maxim, alongside fast shipping so a retrofit or store reset does not stall waiting on freight.
For retail projects specifically, look to product categories built for the layered approach covered throughout this guide:
- Pendants for entrance identity and feature-table accent, including options like the Sonneman Light Guide Ring LED Pendant.
- Track and surface-mount accents for display walls and jewelry cases, such as the Sonneman Zoom LED Surface Mount.
- Wall mounts and flush mounts for transitional zones like fitting rooms and back-of-house areas.
If you are budgeting a full store reset, value engineering with trade pricing can help stretch a fixed budget further without cutting corners on CRI or fixture quality. When you reach out to the trade program, bring your floor plan, your merchandising goals for each zone, and photos of any displays or reference stores whose lighting you admire. That combination lets a spec consultant match fixtures to your layout in one conversation instead of three rounds of back-and-forth.
Maintenance and Durability Considerations for Retail Lighting
Retail fixtures work harder than residential ones. Long operating hours, frequent aiming adjustments on track heads, and constant exposure to dust from foot traffic all shorten a fixture’s useful life faster than most owners expect when they first budget a project.
LED drivers, not the LEDs themselves, are usually the first component to fail. Choose fixtures with driver warranties that match your store’s operating hours; a driver rated for typical residential use may not hold up under 12 to 14 hours a day, seven days a week, in a busy retail environment. Ask your supplier directly what the driver warranty covers, and whether it includes labor for replacement or parts only.
Enclosed display cases and jewelry counters need fixtures rated for their specific thermal environment. Heat buildup in a sealed case shortens LED lifespan and can shift color output over time, which is part of why the ConTech guide recommends LEDs specifically rated for enclosed spaces rather than general-purpose fixtures repurposed into a case.
Set a maintenance rhythm before you need one: a quarterly walk-through to check for color shift, flicker, or dead fixtures catches small problems before customers notice them. Track heads especially drift out of aim over time from vibration and repeated manual adjustment, so build a re-aiming check into that same quarterly routine rather than waiting for a display to look obviously wrong.
Integrating Lighting Design With Branding and Merchandising
Lighting is one of the fastest ways to reinforce brand identity without touching signage, paint, or fixtures budget for a full renovation. A cool, bright, evenly lit store reads as efficient and value-driven; a warmer, higher-contrast space with dramatic accents reads as premium and considered. Neither is right or wrong, but the choice has to match what the brand is actually selling.
Color temperature and contrast ratio should follow directly from brand positioning, not from whatever fixture happened to be on sale. A discount retailer benefits from flatter, brighter, cooler light that helps customers move quickly and compare prices. A specialty boutique benefits from the higher contrast ratios covered earlier, using accent lighting to slow shoppers down and hold their attention on individual pieces.
Merchandising strategy and lighting design need to stay in sync as displays rotate. A store that resets its window and feature tables seasonally needs adjustable track heads and dimming control built in from day one, not bolted on later. Tunable white systems make this easier still, letting a single fixture shift color temperature as a display moves from, say, a cozy autumn homewares theme to a brighter, cooler spring refresh. The category-specific insight that swimwear and seasonal retail rely heavily on merchandising strategy shifts illustrates just how often lighting needs to follow a category’s own seasonal rhythm rather than staying fixed year round.
Budget Planning and Cost Implications for Retail Lighting Projects
Lighting budgets break down into four categories: fixtures, controls, installation labor, and ongoing maintenance. Owners who budget only for fixtures consistently get surprised by the other three, especially controls and labor, which can add substantially to a project’s total cost depending on how much rewiring or new circuiting a space needs.
Fixture cost varies enormously by function. General ambient linear or recessed fixtures sit at the lower end of the spectrum, while adjustable track heads, decorative pendants, and specialty jewelry-case lighting cost more per unit but do more work toward the contrast and mood that actually sell merchandise. Spending more on a smaller number of well-placed accent fixtures usually beats spreading a flat budget evenly across the whole ceiling.
Controls add a real line item that is easy to underestimate. A basic 0 to 10V dimming setup costs far less than a full DALI system with sensors and zone control, and for a single-location boutique, the simpler option is often the right one. Multi-location retailers or larger format stores usually see the centralized control and reporting from a more advanced system pay for itself in energy savings and easier seasonal resets.
Trade pricing changes the math meaningfully for designers, contractors, and repeat buyers. Working with a supplier’s trade program, rather than buying fixtures at retail one at a time, can materially reduce a project’s total fixture cost, especially on multi-fixture orders for a full store buildout or reset. Build a mockup budget into every project too, since testing two or three fixture options on one display before a full order almost always costs less than reordering after installation reveals the wrong CCT or beam angle across an entire floor.
Why Specification Beats Inspiration in Retail Lighting
Most retail lighting advice online is inspiration dressed up as strategy: mood boards, Pinterest-style boutique photos, vague talk of “warm and inviting.” None of that tells an owner what lux level to specify at the cash wrap or what CRI to demand for a jewelry case. The standards exist. IES and CIBSE have done the work. The gap is translation, not information.
The biggest misjudgment we see is treating brightness as the goal. Contrast, not raw lumens, is what makes a display look valuable, and that single reframe changes almost every fixture decision downstream. The second misjudgment is buying fixtures before setting targets, which is backward. Set your lux and CRI targets first, run a mockup, then buy.
If you take one thing from this guide, prioritize adjustability. Merchandising changes constantly; a lighting plan that cannot flex with it is a plan you will be redoing within eighteen months.
— Montreal Lighting & Hardware
Get Retail-Ready Fixtures Through Montreal Lighting & Hardware’s Trade Program
Montreal Lighting & Hardware gives Canadian retailers a direct path from spec sheet to installed fixture, without the markup and guesswork that comes from ordering piecemeal at retail prices. Trade clients get exclusive pricing across a catalog built on designer brands like Savoy House and Maxim, fast shipping to keep a store reset on schedule, and access to a current warehouse sale offering up to 50% off select fixtures.

That combination fits this guide’s approach directly: layered lighting needs a mix of pendants, accents, and surface mounts, and buying them through one trade relationship, instead of chasing separate vendors for each fixture type, keeps a project on budget and on schedule. Whether you need a statement pendant like the Sonneman Light Guide Ring LED Pendant for your entrance display, a compact accent like the Sonneman Pi LED Surface Mount for a feature wall, or a full fixture package for a multi-zone reset, the trade program can spec it against the lux and CRI targets covered in this guide.
Reach out with your floor plan and merchandising goals, and browse Montreal Lighting & Hardware’s full catalog to start pricing out your next retail lighting project today.
Sources
A handful of technical resources back nearly every recommendation in this guide, and they are worth bookmarking if you plan to specify lighting for more than one project.
IES RP-2-20 is the recommended practice document most North American lighting designers treat as the baseline for retail illuminance, uniformity, and merchandising-specific techniques. If you only read one technical standard before your next project, make it this one.
The CIBSE Lighting Guide 17 for retail premises offers a more example-driven companion, walking through different outlet types and covering daylight integration alongside artificial lighting choices, useful for storefronts with significant window exposure.
For grocery and supermarket-format retailers, ENERGY STAR’s supermarket and grocery guidance breaks down energy-savings opportunities specific to that format’s long operating hours and high fixture counts.
Finally, ConTech’s retail lighting design guide translates the standards above into concrete layering, contrast ratio, and mounting-height guidance, the closest thing to a practical field manual among the four.
