

Mount most outdoor wall lights about eye level, around 60 to 66 inches (1.5 to 1.7 m) above the finished surface, measured to the fixture’s center. Beside a standard door, the fixture should stand roughly at one quarter to one third of the door’s height, which is a common practical estimation. Patio and dining fixtures sit a little lower for usable glow, fence and gate lights run a touch higher, and every choice should bend around Canada’s freeze, thaw, and snow season.
TL;DR:
- Mount outdoor wall lights around 60 to 66 inches above finished surfaces, with slight variations based on location and fixture size.
- Measure from the finished ground and use consistent reference points, double-checking with a level and cardboard silhouette before drilling.
- Select fixture size based on door height, aiming for one quarter to one third of the door’s height, and consider profile and mounting height accordingly.
- Use fixtures rated at least IP44, preferably IP65 in harsh regions, and mount them high enough to avoid snow splash and ice damage.
- Proper outdoor lighting setup requires considering weather resistance, safety, and proportional fixture size to achieve an aesthetically pleasing and durable installation.
Table of Contents
- What Is the Best Height for Outdoor Wall Lights by Location?
- How Do You Measure and Mark the Mounting Height?
- How Should Fixture Size Affect Mounting Height?
- What Should Canadian Homeowners Consider for Weather and Safety?
- Our Take on Getting Outdoor Wall Light Height Right
- Where to Find Outdoor Wall Sconces That Fit Your Space
- Sources
What Is the Best Height for Outdoor Wall Lights by Location?
Every doorway, patio, and fence line asks something slightly different of a fixture. A front entry needs enough height to wash light across faces and door hardware without glare. A patio wants a softer wash for the table and chairs below it. Here’s how those needs translate into real numbers you can mark with a tape measure this weekend.
This kind of task-based thinking, mounting higher where you need to see faces and locks, lower where you need usable pooled light, mirrors the approach Natural Resources Canada recommends for matching fixtures to their job rather than a single blanket rule. And Canadian retailers tend to present both imperial and metric figures side by side, since homeowners across the country measure differently depending on where they learned the trade.
For paired fixtures flanking a door, leave about 6 inches between the door trim and the edge of each fixture, and give yourself equal spacing on both sides even if the door isn’t perfectly centered on the wall.
How Do You Measure and Mark the Mounting Height?
Getting this right isn’t complicated, but skipping a step is how you end up with a light that’s two inches off center and impossible to unsee every time you walk up your own driveway.
- Measure from the finished surface. Use the porch floor, deck boards, or ground level once landscaping is done, not the subfloor or bare earth. A finished walkway can sit an inch or two higher than raw concrete.
- Pick your target number. Use 60–66 inches for a front entry, or calculate one quarter to one third of your door’s height if you’re mounting beside a standard 80 inch door.
- Decide what you’re measuring to. Center, bottom, or top of the fixture body all give different results, so pick one and stay consistent, especially with paired fixtures.
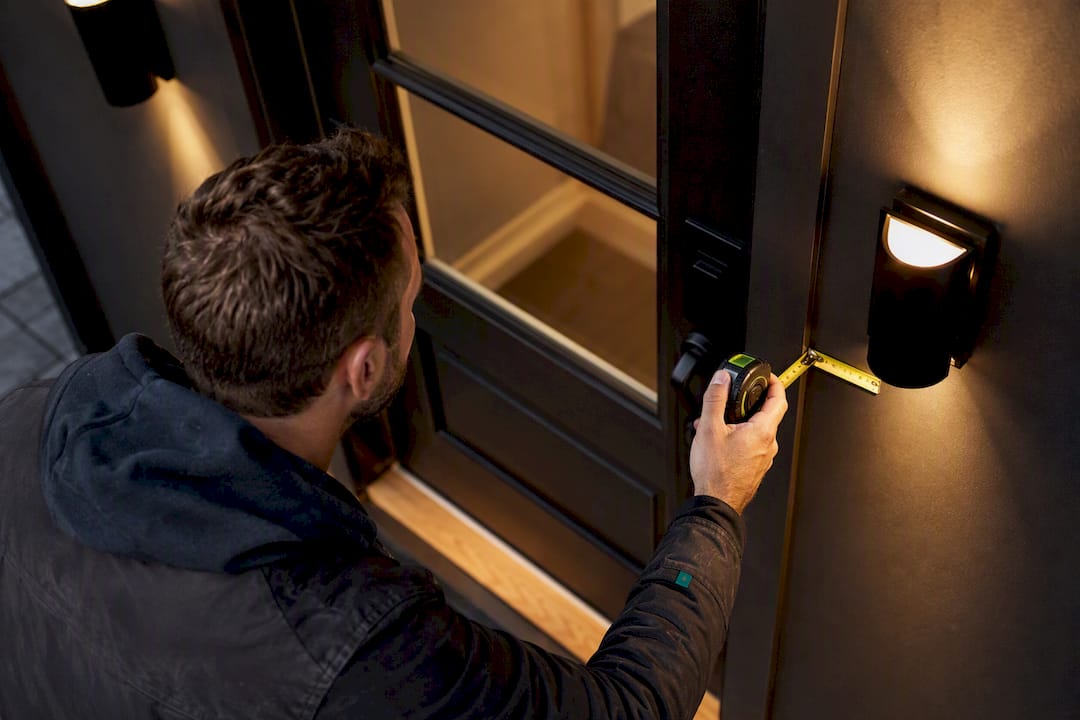
- Mark and double check. Use a level and a pencil, then step back ten feet and look at the mark in context before you drill anything.
- For grouped fixtures, measure and mark all of them at once using the same reference line, rather than eyeballing each one separately after the first is installed.
Pro Tip: Tape a piece of cardboard cut to the fixture’s silhouette at your marked height and look at it from the street or driveway at dusk. It takes five minutes and saves you from a fixture that looks perfect on paper but wrong on the wall.
Before you touch a drill, run through this safety checklist:
- Shut off power at the breaker, not just the switch, and confirm with a voltage tester.
- Use an exterior-rated junction box behind the fixture, never an interior box swapped outdoors.
- Apply a gasket between the fixture and the wall, then seal the top and sides with silicone, leaving the bottom edge open so condensation can escape.
- Call a licensed electrician for any new circuit, high mounting position, or older home wiring you’re not confident about.
Kichler’s placement guidance echoes this eye-level approach, noting that fixtures mounted around shoulder to eye height avoid glare while still doing their job at the door.
How Should Fixture Size Affect Mounting Height?
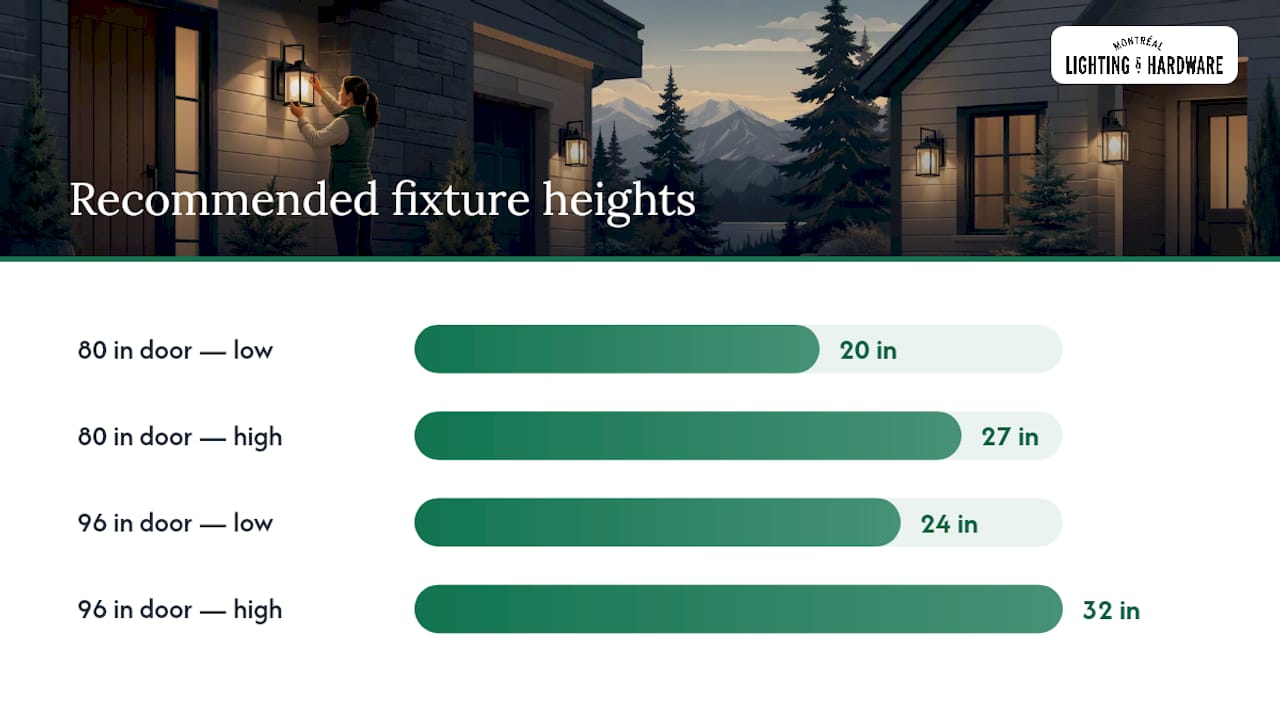
A fixture that’s too large for its door looks like it’s wearing someone else’s coat. The one quarter to one third rule solves this fast: for a standard 80 inch door, that means a fixture roughly 20 to 27 inches tall. For a taller 96 inch entry, common in newer Canadian builds with raised ceilings, you’re looking at 24 to 32 inches, which changes both the fixture you buy and where its center lands on the wall.
Fixture profile matters just as much as height:
- Lantern-style fixtures throw light in most directions, so they read well at standard eye height without feeling harsh.
- Flush mounts sit tighter to the wall and tolerate slightly higher placement since they don’t project outward into a walkway.
- Downlight sconces aim light downward, so mounting them a few inches higher than the standard range keeps the beam landing on the step rather than in someone’s eyes.
For paired or stacked fixtures, consistency beats precision. Two lanterns at exactly the same height look intentional even if that height is a bit unconventional; two lanterns three inches apart look like a mistake. If you’re working with an oversized or custom door, our wall sconce height guide walks through more sizing math, and our entryway lighting ideas piece covers how to keep fixture scale in proportion to the whole facade.
What Should Canadian Homeowners Consider for Weather and Safety?
Canadian winters put outdoor fixtures through more stress than almost anywhere else in North America, and mounting height plays a bigger role in that than most homeowners expect.
- Choose fixtures rated at least IP44, and look for IP65 in coastal regions or anywhere road salt gets kicked up onto walls.
- Mount fixtures high enough to stay clear of snowbank splash zones near driveways and walkways where plows or shovels throw slush.
- Avoid placing fixtures directly under roof edges without gutters, since ice buildup can drip meltwater straight onto the glass or lens.
- Position wall lights so they don’t shine directly into motion sensor or camera lenses, which can wash out night footage or trigger false alerts.
- Leave enough clearance below the fixture for a step stool, since changing a bulb in February shouldn’t require balancing on an icy railing.
Materials that hold up through freeze thaw cycles, like solid brass or powder coated aluminum, tend to outlast painted steel by years in this climate.
Our Take on Getting Outdoor Wall Light Height Right
Homeowners tend to treat outdoor wall light height as an afterthought, something to decide in the last five minutes before the electrician shows up. That’s backwards. The height you choose affects how safe your entry feels at night, how your facade looks from the street, and how much glare bounces back at your guests when they ring the bell.
We’d also push back gently on the idea that one universal number works for every door. A 60 inch mounting height looks perfect on a bungalow with an 80 inch door and feels stubby on a two story build with a 96 inch entry. The door-fraction rule exists precisely because rigid numbers ignore scale, and scale is what makes a facade look designed instead of assembled.
If there’s one thing we’d want every Canadian homeowner to internalize, it’s that weather resistance and mounting height are connected decisions, not separate ones. A gorgeous fixture mounted too low near a snow-clearing path will corrode years before its time, no matter how good its IP rating looks on paper.
— Montreal Lighting & Hardware
Where to Find Outdoor Wall Sconces That Fit Your Space
Once you know your target height, the next step is finding a fixture whose proportions actually work with it. We stock outdoor wall sconces built for Canadian conditions, including the Box LED Wall Sconce, a clean, weather-ready option that suits both modern entries and updated older homes.

Browsing the full outdoor lighting collection gives a sense of scale and finish options side by side, which is the fastest way to spot what will actually flatter door and wall proportions. Trade professionals working on multiple units or full renovation projects can also access trade program pricing directly through the site. If your home has an unusual door size, a custom fence line, or a covered porch where you’re weighing a pendant instead of a sconce, our Light Guide Ring LED Pendant is worth a look for covered outdoor dining spaces. Reach out to the showroom team for mounting advice specific to your project, and pair your new fixture with the right outdoor rugs to finish the space below it.
