

The fastest way to transform a wet bar is to layer pendant lighting, LED strip accenting, and backlit shelving, all wired to dimmers, with damp-rated fixtures anywhere near a sink or ice well. Get those four pieces working together and the space stops feeling like a countertop and starts feeling like a room people want to linger in. Montreal Lighting & Hardware sees this combination outperform single-fixture setups in home after home.
TL;DR:
- Proper layering of pendant lighting, LED strips, and backlit shelving creates a vibrant and functional wet bar environment that outperforms single fixtures.
- Focus on fixture specs such as high CRI above 90, warm color temperature (2700K to 3000K), proper damp or wet ratings, and dimmer compatibility to ensure safety and optimal appearance.
- Accurate measurements for pendant height, spacing, and diffuser placement are critical to achieving a professional, balanced lighting design.
- Task areas require 300 to 500 lux for effective pouring, while ambient lighting should stay within 100 to 200 lux for a relaxed atmosphere.
- Prioritize back-bar and under-cabinet lighting before decorative fixtures; function and quality of light must come first for a genuinely designed space.
Table of Contents
- Wet Bar Lighting Ideas Worth Copying
- How to Choose the Right Fixtures for Your Bar
- Getting the Measurements Right
- Layering Light and Choosing the Right Color
- Damp Ratings and Electrical Safety Near Water
- Why Fixture Specs Matter as Much as Style
- What Actually Makes a Wet Bar Feel Designed
- Ready to Light Your Bar the Right Way
- Sources
Wet Bar Lighting Ideas Worth Copying
A wet bar earns its glow from a mix of fixture types working at different jobs, not from one statement piece doing all the work. Below are the ideas that show up again and again in well-lit home bars, each with the practical detail that makes it work rather than just look good in a photo.
- Pendant clusters over the counter. Three matching pendants remain the classic anchor for a standard home bar, and for good reason: they mark the bar as a distinct zone while throwing usable light onto the work surface. Space them evenly and keep the glass and finish consistent with the room’s other metals.
- LED strips under the upper cabinets. A continuous strip tucked behind the front lip lights the pour zone without glare in your eyes. Choose COB (chip-on-board) strips over standard 5050 strips. They pack LEDs so densely that the light reads as one smooth line instead of a row of dots.
- Backlit floating shelves. Run a slim LED strip along the underside or rear edge of open shelving so bottles glow from behind. This is one of the highest-impact, lowest-cost upgrades you can make to a back bar, since it turns ordinary liquor bottles into a lit display.
- Edge-lit glass shelving. Instead of lighting the shelf from above, light it from the edge so the glass itself carries the glow. Pairs beautifully with mirrored or glass backsplashes; a glass feature elsewhere in the room helps the effect feel intentional rather than accidental.
- Recessed gimbal downlights. Fixed cans wash light straight down and can create hot spots on a polished counter. Gimbal trims tilt, so you can aim the beam at the bottle display or the pour station instead of the bartender’s forehead.
- Wall sconces for narrow nooks. In a tight bar alcove where pendants would hang too low, a pair of wall sconces gives you ambient wash without eating headroom. A fixture like the Sabon LED wall sconce works well flanking a mirror or shelving unit.
- A small crystal or linear chandelier. For bars in a dining or great room setting, a compact chandelier over the counter signals “this is furniture, not just storage.” Keep the scale modest. A fixture sized for a dining table will overwhelm a six-foot bar.
- Track lighting for flexible aiming. If your bottle collection or bar layout changes often, track heads let you redirect light without an electrician. Good option for rental spaces or bars that double as a hobby station.
- Neon or RGB accent strips. A thin line of color along a kickplate or behind a backsplash adds personality for game nights and parties. Use it as an accent only. Full-room RGB lighting reads more arcade than lounge.
- Fiber-optic point lighting. Some designers tuck fiber-optic pinpoints into a coffered ceiling or shelf backing for a starlight effect. It is a dramatic, low-heat option for bars that want a “wow” moment without visible fixtures.
- Motion-activated task lights. Small battery or hardwired pucks that trigger when you open a cabinet or approach the counter add convenience in low-traffic bars, especially ones tucked into basements.
- Weatherproof fixtures for patio or pool bars. Any wet bar that lives outdoors needs wet-rated (not just damp-rated) fixtures, sealed LED channels, and finishes built to resist humidity and salt air.
- Wall-mounted vanity-style bars for narrow counters. A slim linear LED bar, the kind typically used over a bathroom mirror, works surprisingly well as under-shelf lighting in a narrow bar niche where a full strip channel won’t fit.
Sipthestyle’s roundup of wet bar lighting ideas covers several of these in more depth if you want additional visual reference before you commit to a layout.
How to Choose the Right Fixtures for Your Bar
Picking fixtures gets easier once you stop shopping by looks first and start shopping by job. Every fixture in a wet bar is either doing task work, ambient work, or accent work, and mixing those up is how bars end up either too dim to pour a drink or too bright to relax in.
- Match brightness to the job. Task areas, the pour station and cutting surface, need roughly 300 to 500 lux, while ambient lighting around the rest of the counter can sit comfortably at 100 to 200 lux.
- Confirm dimmer compatibility before you buy. LED fixtures need dimmers rated for LED loads (ELV or TRIAC, depending on the driver), not the old dimmers left over from incandescent bulbs.
- Check the CRI rating. Anything under 90 CRI will make amber spirits and citrus garnishes look flat and slightly off. High-CRI LEDs render bottle labels and drinks the way your eye expects.
- Pick a color temperature in the 2700K to 3000K range. This is the warm white that flatters skin tones and wood finishes; anything above 4000K starts to feel clinical, more office break room than home bar.
- Check the IP or damp rating on anything within splash range of a sink or ice well. Standard indoor fixtures are not built for that exposure, and a damp rating is the baseline requirement there.
- Plan your power source for LED strips. Most strips run on 12V or 24V and need a transformer; know your total wattage before ordering so the driver isn’t undersized.
- Bring in a licensed electrician for new circuits or GFCI work. Wet bar wiring near water is not the place to improvise.
Pro Tip: If you can only upgrade one thing on a tight budget, put your money into the back-bar and under-cabinet lighting first. It delivers more visible transformation per dollar than any single pendant swap.
Getting the Measurements Right
Good wet bar lighting lives or dies on a handful of measurements, and they are worth getting exactly right rather than eyeballing.
- Hang pendants at a height that balances sufficient task lighting with comfortable headroom for guests, avoiding going so low it risks interfering with standing guests or so high that the fixture stops providing useful illumination.
- Space multiple pendants evenly across the bar length, with spacing adjusted based on fixture size and bar dimensions to ensure balanced light distribution and aesthetics.
- Recess LED strips behind the cabinet’s front lip or inside a proper diffuser channel so the light source stays hidden and only the glow shows.
- For cove or shelf-edge lighting, keep a minimum setback from the visible edge so you see illuminated glass or wood, not a bare LED strip.
- Choose gimbal trims over fixed cans for recessed downlights so you can aim the beam precisely and cut down on hot spots and glare.
- Use baffle trims on any recessed fixture near seating to soften the light source itself when someone looks up.
- Wire ambient, task, and accent layers to separate circuits or switch legs, then route them into a single scene controller so you’re not manually adjusting three dimmers every time you want a different mood.
Small adjustments here matter more than they should. A pendant hung four inches too low or a strip mounted without a diffuser channel can be the difference between a bar that looks professionally designed and one that looks unfinished.
Layering Light and Choosing the Right Color
Every well-lit wet bar runs on three layers working together: ambient light fills the room, task light handles the work surface, and accent light adds mood and drama to bottles or shelving. Skip any one of the three and the space feels either flat or harsh.
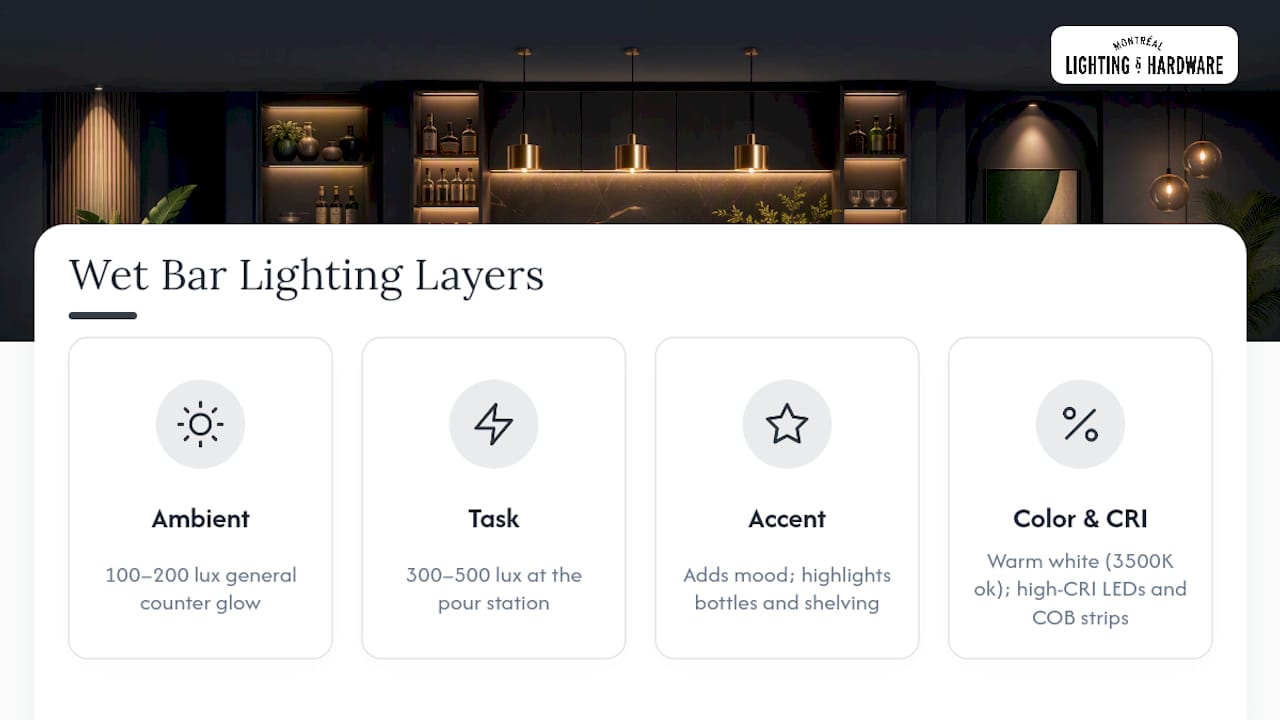
Keep task lighting brighter than ambient, roughly 300 to 500 lux at the pour station against 100 to 200 lux for the general counter glow. That contrast is what makes a bar feel purposeful rather than uniformly lit like a hallway.
Choose a warm white color temperature for the bulk of your fixtures, typically in the range that flatters skin tones and creates a cozy, lounge-like atmosphere. A neutral 3500K can work in a bar that doubles as a kitchen prep space, but push much past 4000K and the room loses its warmth entirely.
High-CRI LEDs matter more here than in almost any other room in the house, since accurate color rendering is what makes a shelf of amber whiskey or a garnish tray actually look appetizing. COB strips are worth the small upgrade cost for the same reason. Their continuous glow reads as far more premium than the visible dotting you get from standard strip lighting.
For control, set up dimming presets rather than a single dimmer slider: one scene for prepping drinks at full brightness, one for a relaxed evening at 30 to 40 percent, and one for a party with accents at full color and ambient light pulled low. This kind of tunable, scene-based control is increasingly standard in 2026 home bar builds, and it’s a far more useful upgrade than any single fixture swap.
Damp Ratings and Electrical Safety Near Water
Any fixture within splash range of a sink, ice well, or draft tower needs a damp rating at minimum; fixtures that could face direct water contact need a full wet rating instead. These aren’t interchangeable, and using a standard indoor fixture in either zone is a real hazard, not just a code technicality.
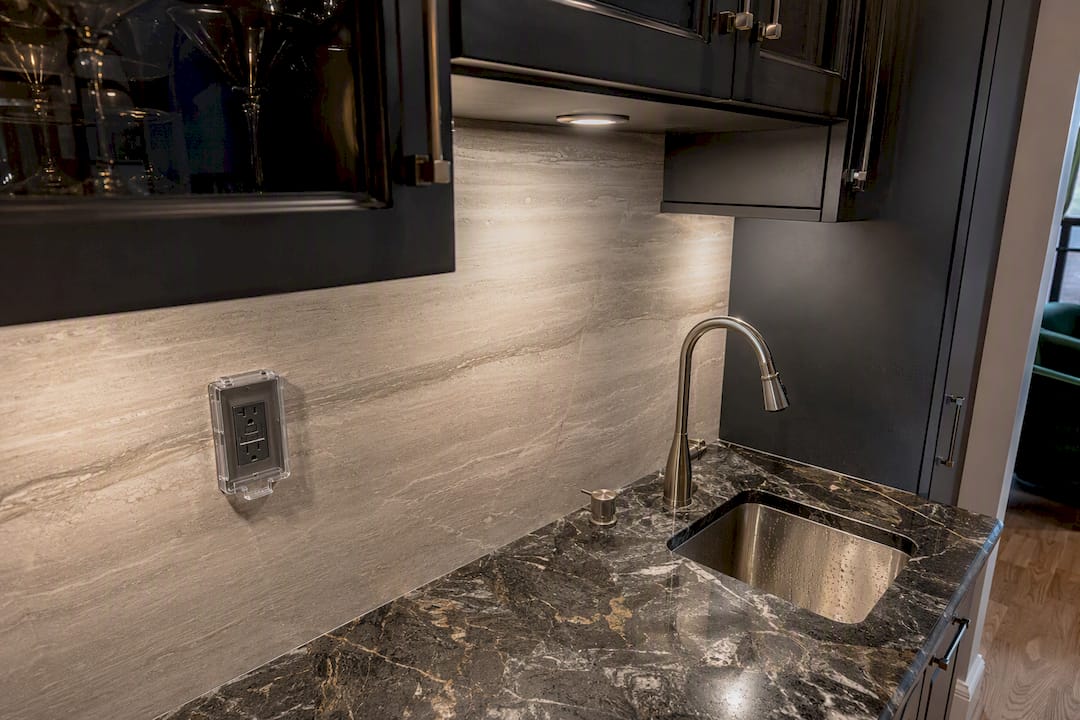
Outlets near water sources require GFCI protection, and any new circuit for bar lighting should go through a licensed electrician familiar with your local code. For the fixtures themselves, look for corrosion-resistant finishes and sealed LED channels wherever strips run close to a splash zone. Chrome and unsealed connectors are common failure points in wet bar installs within just a couple of years.
Why Fixture Specs Matter as Much as Style
Choosing wet bar lighting well means treating the specs as seriously as the aesthetic, and that’s where Montreal Lighting & Hardware’s product lineup earns its place in the conversation. The catalog includes designer names like Savoy House and Maxim, chosen specifically because they meet the damp-rating, high-CRI, and LED-density standards outlined above, not just because they photograph well.
Every checklist item covered here, dimmability, CRI above 90, correct color temperature, appropriate damp or wet rating, maps directly onto product filters you can apply while browsing. For bars with more complex wiring needs, multiple circuits, scene controllers, custom pendant heights, the trade program and showroom consultation give homeowners and designers a place to work through the details with someone who has specified these fixtures before.
What Actually Makes a Wet Bar Feel Designed
Most wet bar lighting advice treats fixture choice as a style decision first and a function decision second. That’s backwards. The bars that feel genuinely designed, the ones that look like they belong in a magazine rather than a big-box showroom, get their brightness levels, color temperature, and layering right before anyone worries about whether the pendant glass matches the cabinet hardware.
The overrated move is chasing a single statement fixture and hoping it carries the whole room. It won’t. A gorgeous pendant over a bar with no under-cabinet light and no backlit shelving still looks unfinished, because the eye reads contrast and depth, not just the presence of one nice object.
If you take one thing from this guide, prioritize the under-cabinet and back-bar lighting first, then build the pendant layer on top of that foundation. Get the CRI and color temperature right before you worry about finish and style. Function first has always produced better-looking bars than style first, even though it’s the less exciting purchase to make.
— Montreal Lighting & Hardware
Ready to Light Your Bar the Right Way
Montreal Lighting & Hardware carries the fixture families that make every idea in this guide possible: pendant clusters, under-cabinet LED strips, and wall sconces, all filterable by CRI, color temperature, and damp rating so you’re not guessing at specs from a product photo.

If you’re drawn to a pendant cluster over the counter, the Stiletto LED Pendant offers the clean, warm-toned glow that works well in groups of three above a standard bar counter. For bars with more complex layouts, split circuits, custom pendant drops, or a mix of task and accent zones, the trade program connects you with pricing built for designers and contractors, and the showroom lets you see finishes and warm-white color temperature in person before you commit. Browse the full collection at Montreal Lighting & Hardware to start narrowing down fixtures for your space, or explore the Malibu Discs LED Pendant for a more modern, disc-shaped alternative to a traditional pendant shade.
Sources
- How to choose the right lighting for your home bar — CliqStudios
- 15 Wet Bar Lighting Ideas to Brighten Your Space — Sipthestyle
- Bar counter lighting ideas: fixture types, layout, and scene control — Build-Construct
